
Nothing gets kids more excited for science than hands-on experiments! Watch your 4th grade science students’ eyes light up when they try some of these activities that show biology, engineering, chemistry, and more! We chose projects that are easy to set up and really help drive the learning home. Plus, many of these ideas work for science fair projects.
Studying something specific? Jump to:
- 4th Grade Science Projects about Energy
- 4th Grade Science Projects about Light and Sound Waves
- 4th Grade Biology Projects
- 4th Grade Science Projects Exploring Density
- 4th Grade Earth Science Experiments
- 4th Grade Engineering Projects
- 4th Grade Physics Experiments
- 4th Grade Chemistry Science Projects
How to use Science Experiments in 4th Grade
Fourth graders are a curious bunch. Tap their curiosity by building in demonstrations and hands-on experiments into science class. You can also use science experiments to reinforce executive function skills and build background knowledge they will use when reading nonfiction. Here are our favorite ways to use science experiments in 4th grade:
- Kick off a lesson: Start a science or nonfiction unit with a demonstration of the concept you’re about to learn about. Studying magnetism? Make magnetic slime. About to read about the human body, show them how the lungs work.
- Hands-on centers: A lot of these demonstrations actually don’t take that long to complete. Incorporate a few hands-on experiments into center rotations so students can move through three or four experiments in a session.
- Do the same experiment twice. When you teach a science concept, show students the demonstration at the beginning and end, then reflect on how their understanding of the concept and ability to explain it has changed. For example, you may show them the floating egg demonstration before and after studying density and listen for how students’ vocabulary changes as they learn about what’s actually happening.
- Plan a science fair: Science fairs teach planning, organization, and presentation skills. Encourage students to brainstorm a topic they’re interested in, and check out the science fair ideas on our list.
4th Grade Science Projects About Energy
These 4th grade science experiments also work well as science fair projects. Try changing up the variables to turn it into a real experiment, then form a hypothesis and find out what happens.
Marble Flick
- Difficulty: Easy
- Materials: Basic
- Materials Needed: Marbles, flat surface
- Time: 10-15 minutes
- Best for: Classroom demonstration
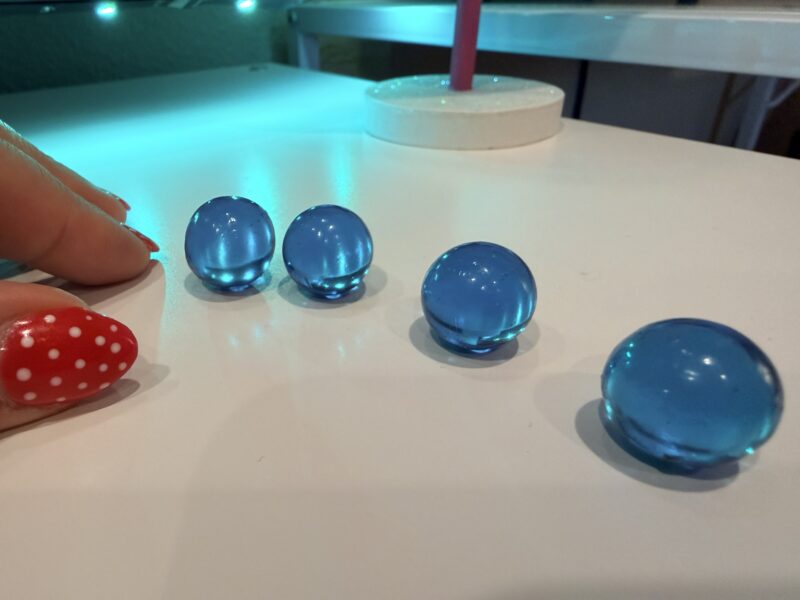
Line up several marbles on a flat surface, then flick another marble into the row. Students can observe how
the motion transfers energy through the stationary marbles and causes the marble at the opposite end to move.
Experiment with different numbers of marbles and flicking speeds to explore how kinetic energy moves
through objects during a collision.
Sport balls energy transfer
- Difficulty: Easy
- Materials: Basic
- Materials Needed: Basketball, tennis ball, open space
- Time: 5-10 minutes
- Best for: Classroom demonstration
Place a tennis ball on top of a basketball and drop both balls at the same time. When the basketball hits the ground, some of its energy transfers to the tennis ball, sending it high into the air. Have students compare the result with dropping each ball separately and discuss how energy can move from one object to another.
Energy scavenger hunt
- Difficulty: Easy
- Materials: Basic
- Materials Needed: Printable scavenger hunt list, pencils
- Time: 20-30 minutes
- Best for: Hands-on experiment
Invite students to look around the classroom, school, or playground for examples of energy in action. They might spot light from the sun, sound from a speaker, heat from a radiator, or motion from a rolling ball. Ask students to record each example and identify the type of energy they observe.
Heat-powered windmill
- Difficulty: Medium
- Materials: Medium
- Materials Needed: Small paper windmill or pinwheel, candle (with adult supervision), stand
- Time: 10-15 minutes
- Best for: Classroom demonstration
Position a lightweight paper windmill above a candle flame, leaving plenty of space between the paper and the flame. As warm air rises, it creates a convection current that causes the windmill to spin. Use this demonstration to help students visualize how thermal energy can create movement.
Soda can motion
- Difficulty: Easy
- Materials: Medium
- Materials Needed: Empty soda cans of different sizes, ramp, ruler or measuring tape
- Time: 15-20 minutes
- Best for: Classroom demonstration, Science fair project
First, capture the characteristics of a few different soda cans. Are they full or empty? How much does each weigh? Are they the same shape and volume? Roll different soda cans down the same ramp and compare how they move. Students can measure the distance traveled or time how long each can takes to reach the bottom. Record the characteristics that made each soda can move faster or slower. Discuss how force, mass, and acceleration work together to affect an object’s motion.
Spinning tops
- Difficulty: Easy
- Materials: Medium
- Materials Needed: Marbles, glue, flat surface
- Time: 15-20 minutes
- Best for: Classroom demonstration, Science fair project
Glue marbles together in different arrangements to create simple spinning tops. Once the glue dries, record the shape of each marble top and have students spin each design. Use a timer to track how long it stays upright. Compare the results to explore how mass distribution, balance, and inertia affect motion.
Gravity beads
- Difficulty: Easy
- Materials: Medium
- Materials Needed: Long strand of beads, cup or container
- Time: 5-10 minutes
- Best for: Classroom demonstration
Place a long strand of beads in a cup with a small section hanging over the edge. Pull the dangling end and let the beads flow out of the cup. Students will see the strand appear to leap upward before falling, offering a memorable way to explore gravity, inertia, and motion.
Hovercrafts
- Difficulty: Easy
- Materials: Medium
- Materials Needed: Old CD or DVD, balloon, bottle cap with a push-pull top, glue or tape
- Time: 10-15 minutes
- Best for: Classroom demonstration
Attach the bottle cap securely over the hole in the center of a CD. Inflate a balloon, stretch it over the cap, and release the air. The air flowing beneath the CD reduces friction and allows the hovercraft to glide across a smooth surface.
Tornado in a bottle
- Difficulty: Easy
- Materials: Basic
- Materials Needed: Clear plastic bottle, water, dish soap, glitter or food coloring if desired
- Time: 10-15 minutes
- Best for: Classroom demonstration, Science fair experiment
Fill a bottle about three-quarters full with water and add a small drop of dish soap. Secure the lid, then swirl the bottle in a circular motion. Students can watch a vortex form and discuss how rotating water creates a tornado-like shape.
Bottle Rockets
- Difficulty: Medium
- Materials: Medium
- Materials Needed: Plastic bottle, baking soda, vinegar, cork, tape, paper towel, safety goggles, outdoor space, adult supervision
- Time: 5-10 minutes
- Best for: Science Fair
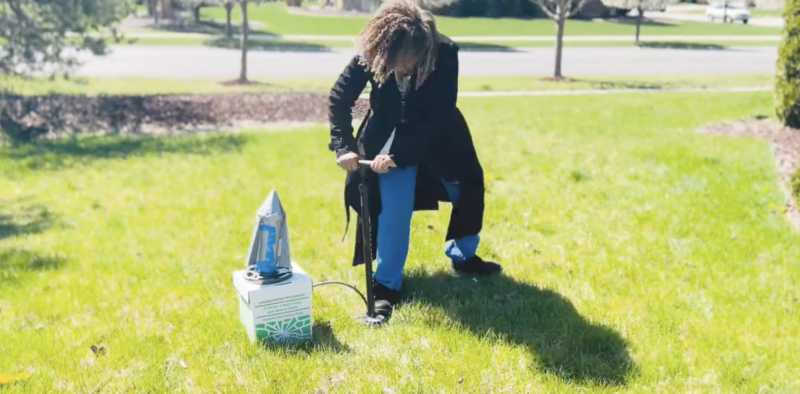
Add vinegar to a plastic bottle and wrap baking soda in a small piece of paper towel. Drop the packet into the bottle, secure the cork, and place the rocket on the ground outdoors. As gas builds up inside the bottle, the cork releases and the bottle launches, demonstrating chemical energy, gas pressure, and thrust.
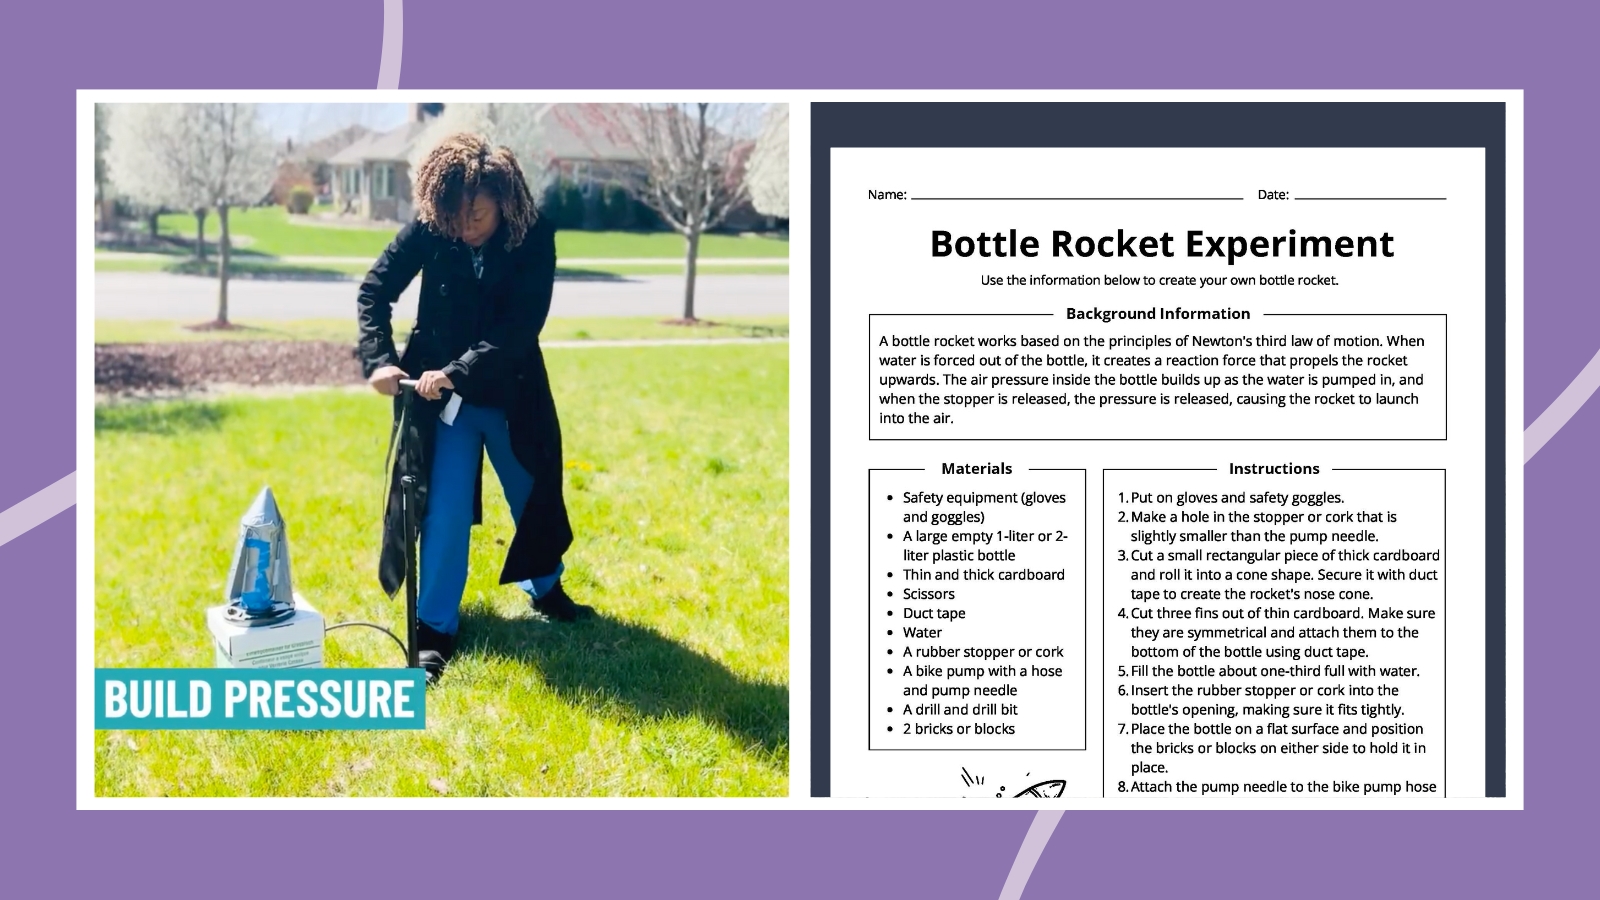
Bottle Rocket Experiment (Worksheet + Demo Video)
Watch the demo video and grab your free Bottle Rocket Experiment instructions and worksheet for students.
4th Grade Science Projects About Light and Sound Waves
Help students explore how waves transfer energy through sound, light, and water. These 4th grade science projects use simple materials to demonstrate concepts like vibration, reflection, and refraction.
Waves in a bottle
- Difficulty: Easy
- Materials: Basic
- Materials Needed: Clear plastic bottle, water, food coloring (if desired)
- Time: 5-10 minutes
- Best for: Classroom demonstration
Fill a clear bottle about halfway with water and seal the lid tightly. Slowly tilt the bottle from side to side to create waves. Ask students to notice how the water moves and discuss how energy travels through a liquid. Add vocabulary by generating a list of describing words for how waves move (undulate, sway, ripple, surge) before you do the demonstration.
Wave machine
- Difficulty: Medium
- Materials: Medium
- Materials Needed: String, small dowels or skewers, tape, modeling clay or small weighted objects
- Time:15-20 minutes
- Best for: Science fair project
Attach small dowels at regular intervals along a length of string and add a small weight to each end. Secure the string so the dowels can move freely, then tap one end. Students can watch the motion travel across the machine and observe how energy moves through a wave.
Slinky waves
- Difficulty: Easy
- Materials: Medium
- Materials Needed: Slinky, open floor space
- Time: 10-15 minutes
- Best for: Classroom demonstration
Stretch a Slinky across the floor between two students. Move one end from side to side to demonstrate a transverse wave, then push and pull the Slinky forward and backward to create a longitudinal wave. Compare the two movements and discuss how waves transfer energy without moving matter from one end to the other.
Kaleidoscopes
- Difficulty: Medium
- Materials: Medium
- Materials Needed: Cardboard tube, reflective paper or small mirrors, clear plastic, beads, tape
- Time: 30-40 minutes
- Best for: Science fair project, Hands-on experiment
Arrange reflective surfaces inside a cardboard tube, then add small colorful beads behind a clear plastic cover. When students look through the tube and rotate it, they will see repeating patterns created by reflected light. Use the activity to explore reflection, symmetry, and light waves.
Create an optical illusion
- Difficulty: Easy
- Materials: Basic
- Materials Needed: Paper, markers, LEGO bricks or building blocks
- Time: 30-40 minutes
- Best for: Hands-on experiment
Create a drawing or structure that appears to change depending on the viewer’s angle. Students can build with blocks, take photos from different perspectives, or draw simple optical illusions. Discuss how the brain interprets light, shapes, and visual information.
Make a harmonica
- Difficulty: Medium
- Materials: Basic
- Materials Needed: Craft sticks, rubber bands, drinking straws, scissors
- Time: 30-40 minutes
- Best for: Hands-on experiment
Stretch a rubber band around the length of one craft stick, then place small pieces of straw between two craft sticks and secure the ends with additional rubber bands. Blow through the gap to create sound. Students can adjust the straw placement or rubber-band tension to investigate how vibration affects pitch.
Create a smartphone projector
- Difficulty: Medium
- Materials: Medium
- Materials Needed: Cardboard box, magnifying glass, smartphone, tape, scissors or craft knife (adult supervision required)
- Time: 30-40 minutes
- Best for: Science fair project
Cut an opening in one side of a cardboard box and secure a magnifying glass inside the hole. Place a smartphone inside the box and project an image onto a blank wall in a darkened room. Students can adjust the phone’s position to focus the image and explore how lenses bend light.
See light refraction in action
- Difficulty: Easy
- Materials: Basic
- Materials Needed: Clear glass, water, paper, marker
- Time: 10-15 minutes
- Best for: Classroom demonstration
Draw an arrow on a piece of paper and place it behind an empty glass. Slowly fill the glass with water and observe what appears to happen to the arrow. Students can explore how light bends as it passes through air, glass, and water.
“Draw” on water
- Difficulty: Easy
- Materials: Basic
- Materials Needed: Shallow ceramic or glass dish, dry-erase markers, water
- Time: 10-15 minutes
- Best for: Classroom demonstration, Science fair project
Draw a simple shape on a smooth dish using a dry-erase marker. Slowly pour water into the dish and watch the drawing lift from the surface and float. Students can experiment with different shapes and discuss why the marker ink separates from the dish.
Paint with sunscreen
- Difficulty: Easy
- Materials: Basic
- Materials Needed: Sunscreen, dark construction paper or UV-sensitive paper, paintbrushes or cotton swabs, sunlight
- Time: 20-40 minutes
- Best for: Hands-on experiment, Science fair project
Use sunscreen to paint a design on dark paper or UV-sensitive paper, then place the paper in direct sunlight. Compare the protected and unprotected areas after several minutes. Students can observe how sunscreen blocks some ultraviolet rays and protects surfaces from sun exposure.
4th Grade Biology Projects
These biology-focused activities help students understand how living things work. From building models of the heart and lungs to exploring DNA and decomposition, students can investigate how structures support important functions.
Edible DNA model
- Difficulty: Easy
- Materials: Medium
- Materials Needed: Licorice, four colors of gummy candies or marshmallows, toothpicks
- Time: 10-15 minutes
- Best for: Hands-on experiment
Use licorice strands to represent the sides of a DNA molecule and colored candies to represent its bases. Connect the candies with toothpicks, following the base-pairing rules, then gently twist the finished model into a double helix. This activity helps students visualize DNA structure and patterns.
Discover ants’ dining preferences
- Difficulty: Medium
- Materials: Medium
- Materials Needed: Small samples of sugar, honey, fruit, crackers, or other foods; paper plates; outdoor space; observation sheet
- Time: 15 minutes to set up, 2 days to observe
- Best for: Hands-on experiment
Place small amounts of different foods near an active ant trail and observe which foods attract the most ants. Students can make predictions, count ants at regular intervals, and compare the data. Remind students not to disturb the ants or leave food outdoors after the experiment.
Test the effect of music on plant growth
- Difficulty: Medium
- Materials: Medium
- Materials Needed: Similar plants, water, measuring tape or ruler, music player, observation sheet
- Time: 1 week
- Best for: Hands-on experiment, Science fair project
Place similar plants in the same growing conditions and expose them to different music environments or to silence. Measure plant growth regularly and record the results. Discuss the importance of controlling variables and whether the data supports the original hypothesis.
Grow bacteria in petri dishes
- Difficulty: Medium
- Materials: Medium
- Materials Needed: Prepared agar petri dishes, cotton swabs, tape, markers, gloves, adult supervision
- Time: 10-15 minutes in class, 1 week to let the bacteria grow
- Best for: Classroom demonstration, Science fair project
Use cotton swabs to collect samples from surfaces around the classroom, then gently swipe each sample across an agar-filled petri dish. Seal the dishes and observe them over several days without reopening them. Students can compare growth patterns and discuss why handwashing and surface cleaning matter.
Test fruit ripening
- Difficulty: Easy
- Materials: Advanced
- Materials Needed: Similar pieces of unripe fruit, paper bags, ripe banana or apple, labels, observation sheet
- Time: 1 week
- Best for: Science fair project
Place unripe fruit in different conditions, such as on the counter, inside an empty paper bag, and inside a bag with a ripe banana or apple. Observe the fruit over several days and record changes in color, texture, and smell. Students can investigate how ethylene gas affects ripening.
Heart model
- Difficulty: Easy
- Materials: Basic
- Materials Needed: Clear jar or glass, balloon, straws, water, red food coloring, rubber band, scissors
- Time: 15-20 minutes
- Best for: Classroom demonstration, Science fair project
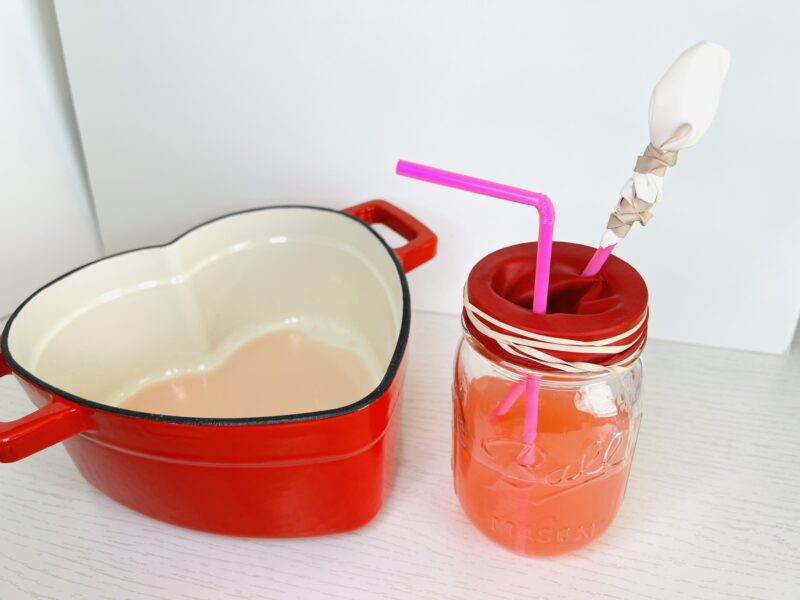
Fill a jar with red-colored water and stretch a balloon over the opening. Carefully poke two straws through the balloon, then press down on the balloon to pump the liquid. Students can observe how pressure moves the “blood” through the straws and connect the model to how the heart circulates blood through the body.
Lung model
- Difficulty: Medium
- Materials: Medium
- Materials Needed: Clear plastic bottle, balloons, straws, tape, rubber bands, modeling clay, scissors (adult supervision needed)
- Time: 10-15 minutes
- Best for: Classroom demonstration, Science fair project
Use a plastic bottle, balloons, and straws to build a model of the respiratory system. Put a balloon inside the bottle. Then, pull down on the balloon stretched across the bottom of the bottle and watch the balloons inside inflate. Students can see how pressure changes help the lungs expand and contract.
Create a new plant or animal
- Difficulty: Easy
- Materials: Basic
- Materials Needed: Paper, pencils, markers, crayons
- Time: 1-3 class periods
- Best for: Hands-on experiment
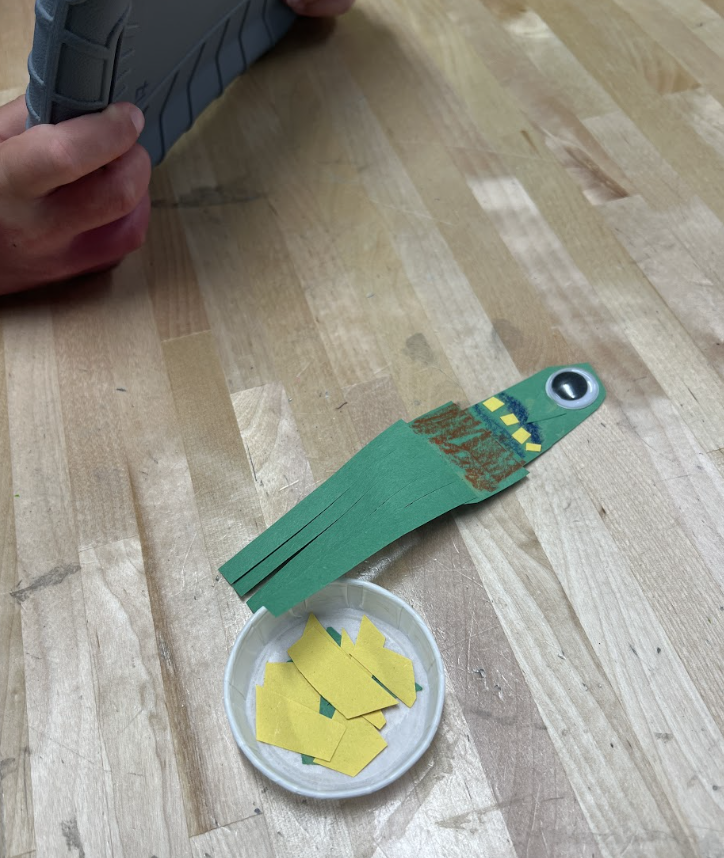
Ask students to invent an organism that could survive in a particular environment. They should draw the plant or animal and explain how each feature helps it live, move, find food, or stay safe. This activity reinforces the relationship between an organism’s structures and their functions.
Explore blood components
- Difficulty: Easy
- Materials: Medium
- Materials Needed: Clear jar, water, red candies, white candies, small candy pieces or sprinkles
- Time: 15-20 minutes
- Best for: Classroom demonstration, Hands-on experiment
Create a model of blood using different candies to represent red blood cells, white blood cells, and platelets. (We recommend jelly beans since they won’t melt easily.) Add the pieces to a jar of water to represent plasma. Students can compare the amount and purpose of each component and discuss how they work together. Research the ratio of red blood cells, white cells, and platelets to show ratio as well.
Turn milk into cheese
- Difficulty: Easy
- Materials: Basic
- Materials Needed: Milk, vinegar or lemon juice, microwave-safe bowl or saucepan, spoon, strainer, and adult supervision needed
- Time: 20-30 minutes
- Best for: Science fair project,
Warm some milk, then add vinegar or lemon juice and stir gently. Students will see the milk separate into curds and liquid whey. Strain the mixture and discuss how adding an acid causes proteins in the milk to clump together.
Investigate decomposition
- Difficulty: Easy
- Materials: Basic
- Materials Needed: Food scraps, sealable plastic bags or clear containers, labels, observation sheet
- Time: 10 minutes per day for 2-4 weeks
- Best for: Science fair project, Hands-on experiment
Place different food scraps in labeled bags or containers and observe them over several days or weeks. Students can compare which foods decompose most quickly and record changes in color, texture, and appearance. Use the activity to discuss microorganisms, waste, and nutrient cycling.
Make a model river
- Difficulty: Medium
- Materials: Basic
- Materials Needed: Tray or shallow bin, sand, water, small rocks, cup, blocks or craft materials if desired
- Time: 20 minutes to build, 1 week to observe
- Best for: Science fair projects, Hands-on experiment
Build a miniature landscape in a tray using sand and rocks, then slowly pour water through it. Students can watch channels, curves, and sediment deposits form as the water moves. Experiment with barriers or changes in slope to observe how rivers reshape land.
4th Grade Experiments Exploring Density
Density demo
- Difficulty: Easy
- Materials: Medium
- Materials Needed: Materials: tall jar, honey or maple syrup, dish soap, water colored with food coloring, vegetable oil, small objects (coin, grape, plastic bottle cap, ping pong ball)
- Time: 10-15 minutes
- Best for: Classroom demonstration, Science fair project
Use common liquids to show density and to show how solids settle in different densities. First, pour the densest liquid (the syrup or honey) into the bottom of the cup. Then, layer the dish soap, colored water, and oil on top. Add objects to see where they settle. The science here: the densest liquids sink while the less dense ones float and the objects sink until they reach a liquid that is more dense than they are.
Density rainbow
- Difficulty: Medium
- Materials: Basic
- Materials Needed: Sugar, water, food coloring, cups, spoon, clear glass or jar, dropper
- Time: 10-15 minutes
- Best for: Classroom demonstration
Pour colored sugar water in to several cups. Each cup should have a different concentration of sugar and water. Carefully layer the liquids in a clear container, starting with the most concentrated solution. Students can observe how liquids with different densities form distinct layers instead of mixing immediately.
Sink and float
- Difficulty: Easy
- Materials: Basic
- Materials Needed: Clear container, water, variety of small objects, towels, recording sheet
- Time: 10-15 minutes
- Best for: Classroom demonstration, Hands-on experiment
Gather classroom objects and ask students to predict whether each one will sink or float. Test the objects one at a time and record the results. Encourage students to look for patterns and discuss how an object’s density affects its behavior in water.
DIY Lava Lamp
- Difficulty: Easy
- Materials: Medium
- Materials Needed: jar or glass, water, glitter, Alka Seltzer tablets, spoon, food coloring
- Time: 15=20 minutes
- Best for: Science fair experiment, Classroom demonstration
Students can put their knowledge of density to use by creating their own lava lamp!
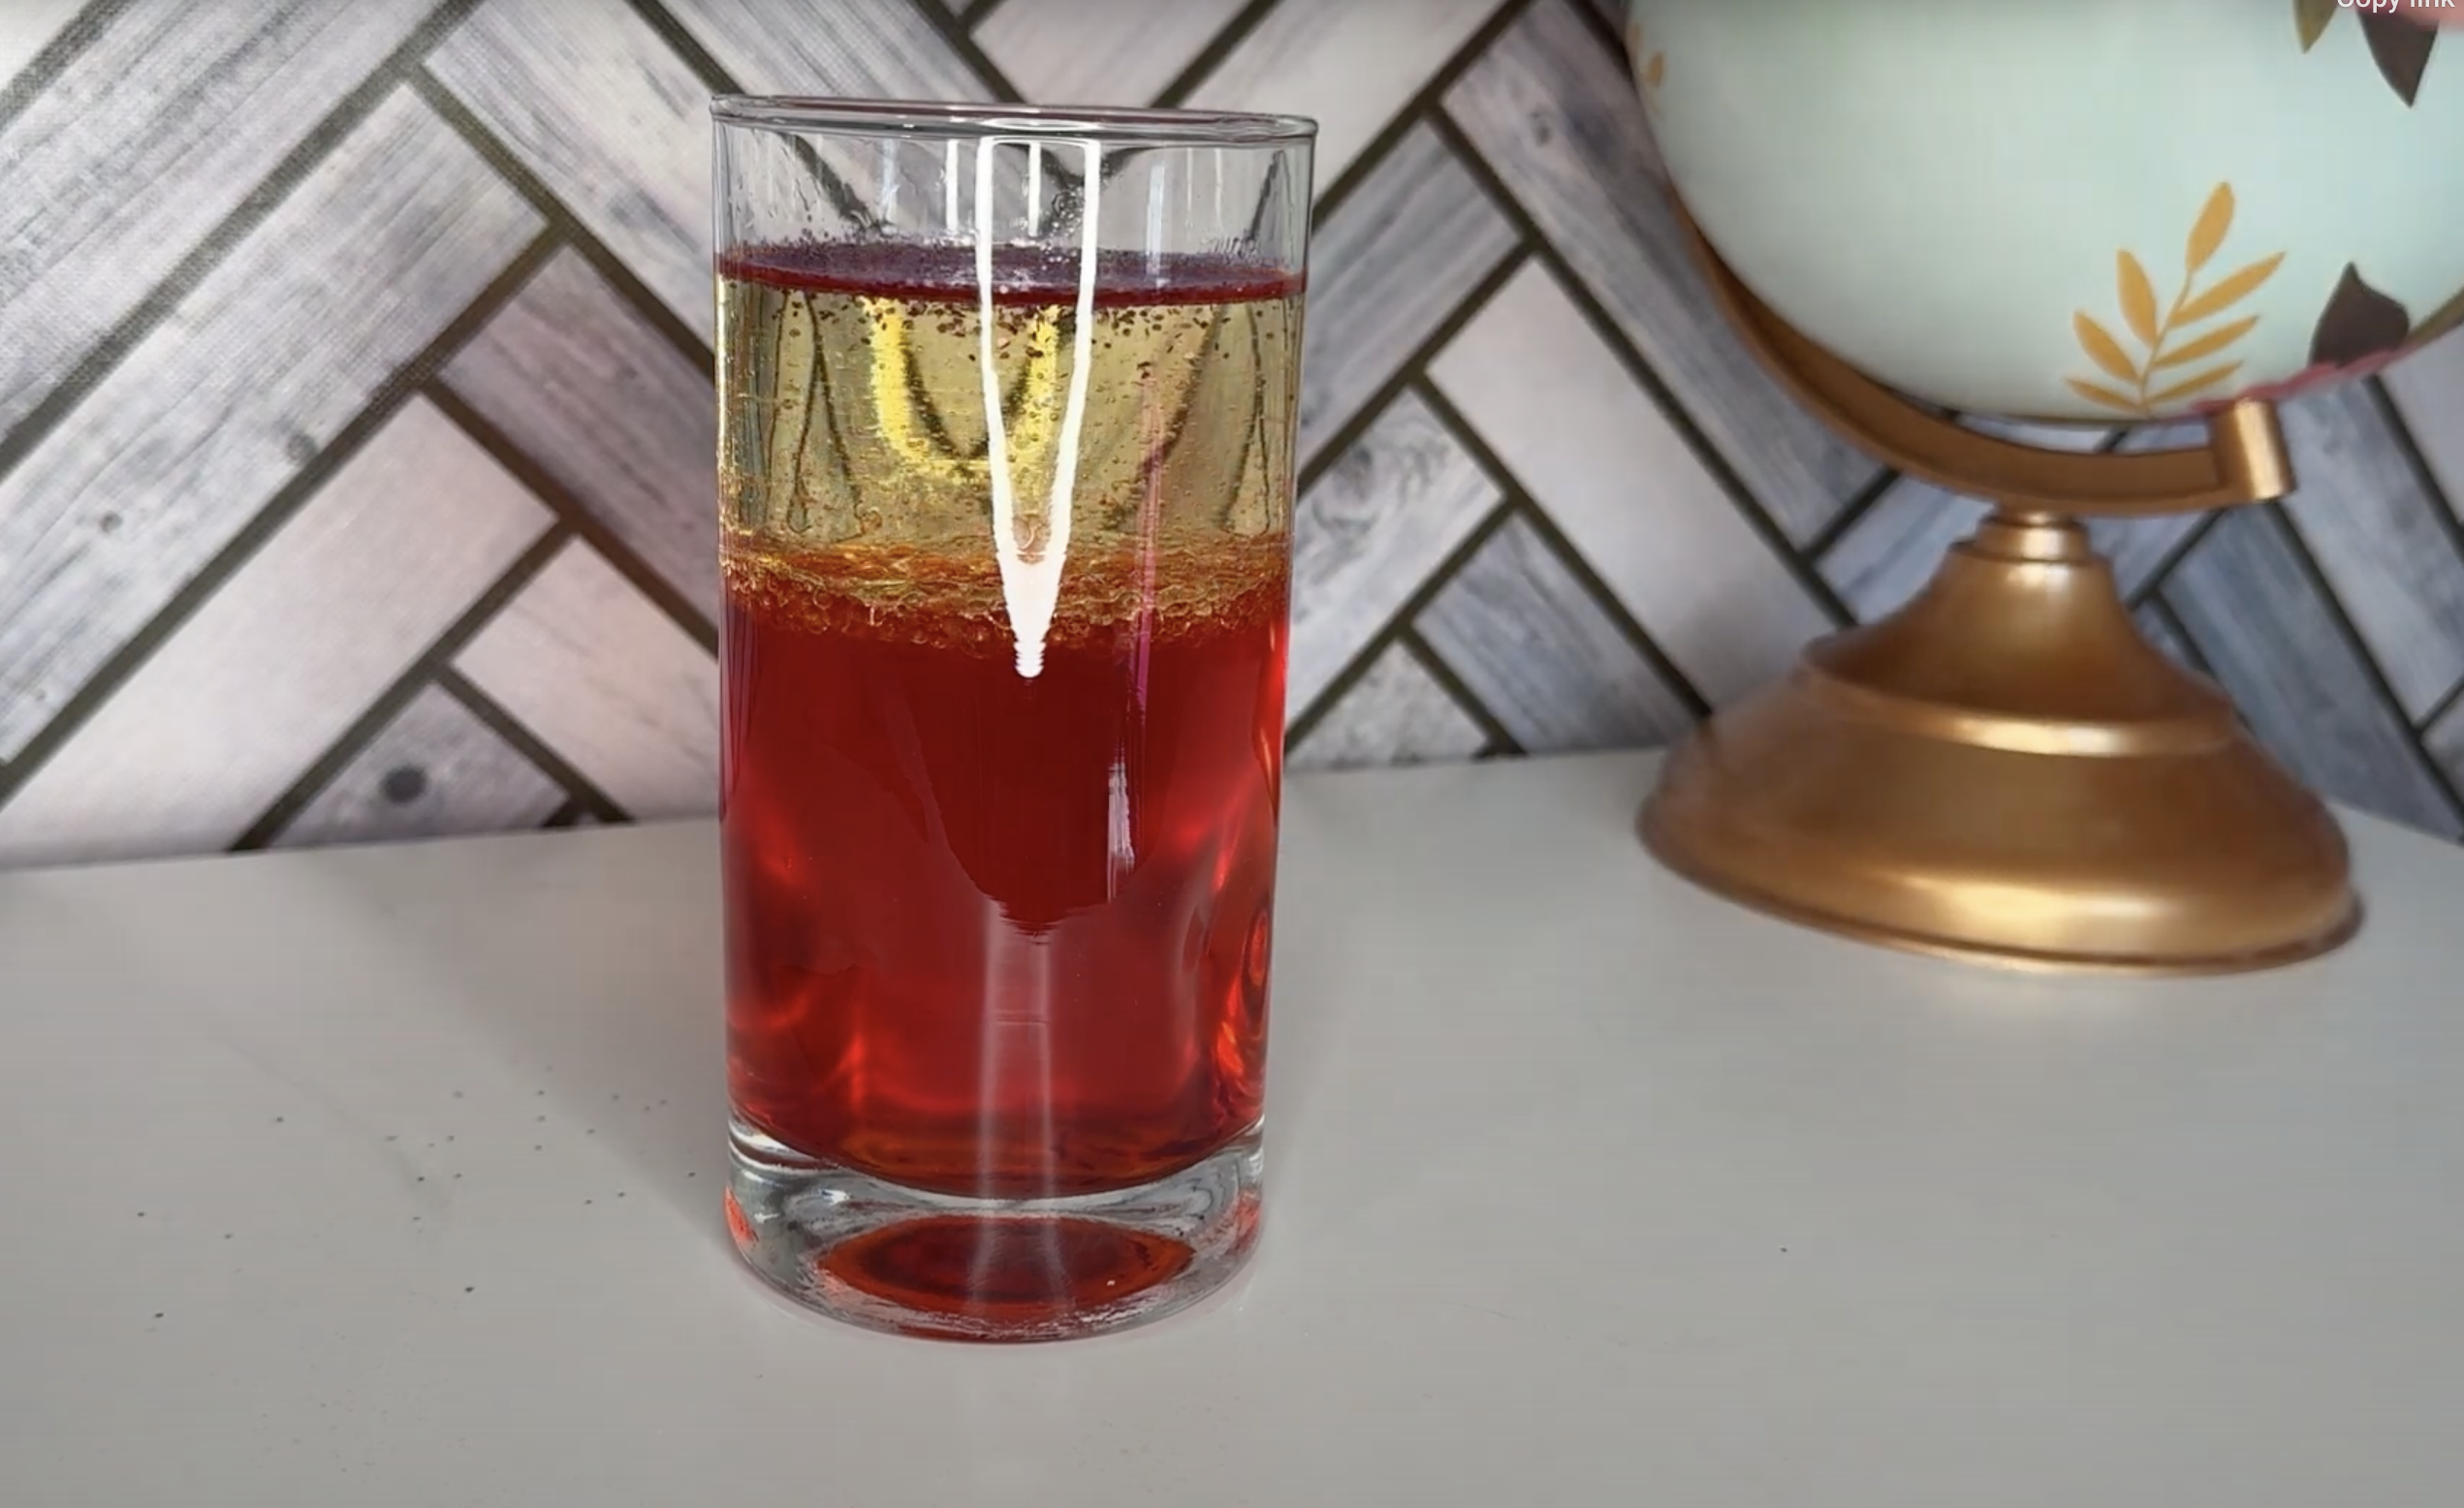
Lava Lamp Experiment
Show how density works with a DIY lava lamp.
Saltwater egg float
- Difficulty: Easy
- Materials: Medium
- Materials Needed: Two identical clear glasses filled with water, table salt, two fresh eggs
- Time: 10-15 minutes
- Best for: Classroom demonstration
Students test how adding salt to water changes its density and how that changes what can float in it. First, drop an egg into the glass of plain water. It will sink to the bottom. Then, stir in several spoonfuls of salt. Drop the second egg into the saltwater. It should float.
4th Grade Earth Science Projects
Explore the forces that shape our planet with these hands-on 4th grade science projects. Students can model erosion, ocean currents, earthquakes, soil layers, and other Earth processes using easy-to-find materials.
See coastal erosion in action

- Difficulty: Easy
- Materials: Medium
- Materials Needed: Tray or shallow bin, sand, water, small rocks, cup
- Time: 30-40 minutes
- Best for: Hands-on experiment, Science fair project
Build a sandy shoreline along one side of a tray and slowly pour or gently push water toward the sand. Students can observe how repeated waves move sediment and reshape the coast. Add rocks or barriers to test how different structures affect erosion.
Form ocean currents
- Difficulty: Easy
- Materials: Basic
- Materials Needed: Clear tray or container, warm water, cold water, food coloring, cups
- Time: 10-15 minutes
- Best for: Classroom demonstration
Add warm and cold colored water to different sides of a clear container. Students can observe the liquids moving and mixing as density differences create currents. Use the demonstration to discuss how temperature helps drive movement in the ocean.
Nonrenewable resources
- Difficulty: Easy
- Materials: Medium
- Materials Needed: Chocolate-chip cookie dough or prepared cookies, spoons or toothpicks, paper plates, recording sheet
- Time: 10-15 minutes
- Best for: Hands-on experiment
Give students a limited number of “resources” to extract from a cookie or dough model. Ask them to track how quickly the resources become harder to find and what happens to the surrounding area. Use the activity to discuss why nonrenewable resources are finite and how extraction can affect the environment.
Make a model seismometer
- Difficulty: Medium
- Materials: Basic
- Materials Needed: Cup or small container, string, marker, modeling clay or small weight, cardboard box, paper
- Time: 25-30 minutes
- Best for: Classroom demonstrations
Suspend a marker from a string inside a cardboard box so the tip rests lightly on a strip of paper. Move the box while pulling the paper beneath the marker. Students can observe how the recorded lines change as the vibrations become stronger or weaker.
Mine for chocolate chips
- Difficulty: Easy
- Materials: Medium
- Materials Needed: Chocolate-chip cookies, toothpicks, paper plates, timer, recording sheet
- Time: 10-15 minutes
- Best for: Hands-on experiment
Challenge students to remove as many chocolate chips as possible from a cookie without damaging the surrounding area. Set a time limit and compare the results. Students can reflect on the trade-offs involved in mining for natural resources and restoring land afterward.
Turn a penny green
- Difficulty: Easy
- Materials: Basic
- Materials Needed: Pennies, vinegar, salt, cup or bowl, paper towel
- Time: 10-15 minutes in class, one overnight
- Best for: Classroom demonstration, Science fair project
Dip pennies in a mixture of vinegar and salt, then place them on a paper towel and observe them over time. Students will notice changes in color as the copper reacts with substances in the air. Use the experiment to discuss oxidation and how materials can change through chemical reactions.
Edible soil model
- Difficulty: Easy
- Materials: Medium
- Materials Needed: Clear cups, pudding, crushed cookies, gummy worms, cereal or candy pieces, spoons
- Time: 10-15 minutes
- Best for: Hands-on experiment
Layer edible ingredients in a clear cup to represent bedrock, subsoil, topsoil, and organic matter. Add gummy worms or other details to show organisms that live in soil. Students can label each layer and discuss how soil supports plant and animal life.
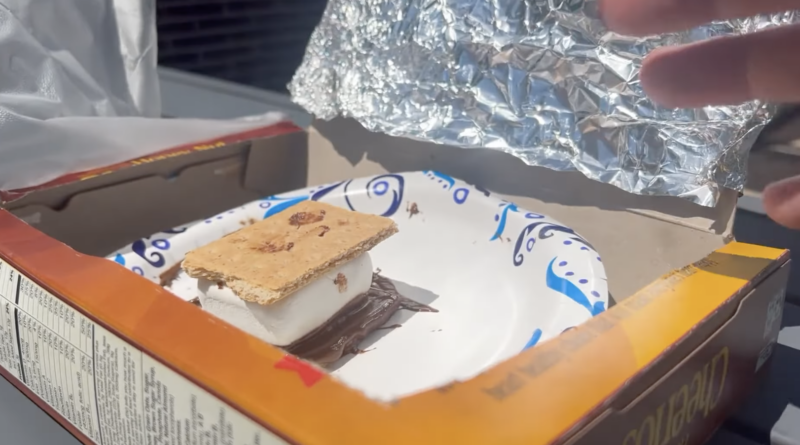
Build a solar oven
- Difficulty: Medium
- Materials: Medium
- Materials Needed: Cardboard box, aluminum foil, plastic wrap, black construction paper, tape, food item, thermometer if desired, sunlight
- Time: 30-40 minutes
- Best for: Hands-on experiment, Science fair project
Line a cardboard box with foil and black paper, then cover the opening with plastic wrap. Place a small food item inside and set the oven in direct sunlight. Students can record temperature changes and observe how sunlight is absorbed and trapped as heat energy.
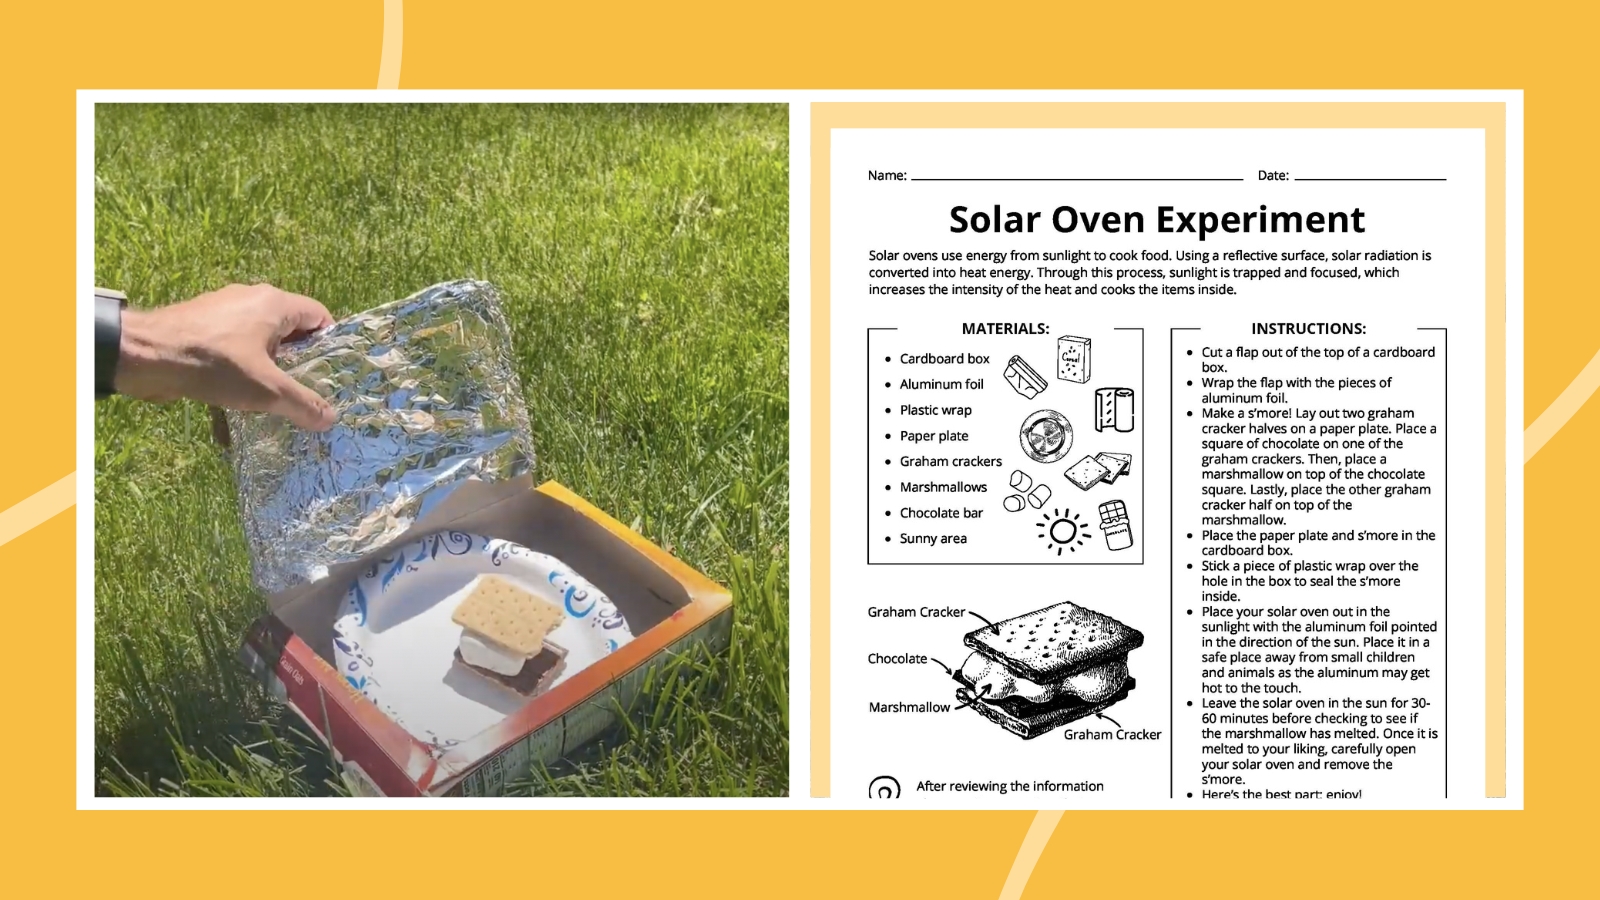
Solar Oven Experiment (Worksheet + Demo Video)
Watch the video to learn how to build a safe solar oven. Then grab your free printable experiment recording sheet.
Simulate an earthquake
- Difficulty: Medium
- Materials: Basic
- Materials Needed: Prepared gelatin, shallow pan, toothpicks or building blocks, small toy structures
- Time: 15-20 minutes
- Best for: Classroom demonstration
Build small structures on top of a pan of gelatin, then gently shake the pan. Students can observe how different designs respond to the movement. Challenge them to modify their structures and test which building features improve stability during an earthquake.
Natural disasters challenge
- Difficulty: Advanced
- Materials: Difficult
- Materials Needed: building materials, platforms, materials to create wind, shaking, and flooding
- Time: 1 week
- Best for: Science fair projects
Challenge students to build a structure that will withstand a natural disaster. Divide students into groups and have them each tackle a natural disaster (wind storm, hurricane, flood, earthquake). Once their structures are built, simulate the natural disasters with fans, leaf blowers, shaking, etc to see which qualities make for strong construction.
Erupt a lemon volcano
- Difficulty: Easy
- Materials: Basic
- Materials Needed: Lemon, baking soda, food coloring, dish soap, craft stick or spoon, tray
- Time: 10-15 minutes
- Best for: Classroom demonstration
Cut the top from a lemon, loosen the inside with a craft stick, and add food coloring and a small amount of dish soap. Sprinkle baking soda onto the lemon and stir gently. Students can watch the foamy reaction and discuss how an acid and a base react to produce gas.
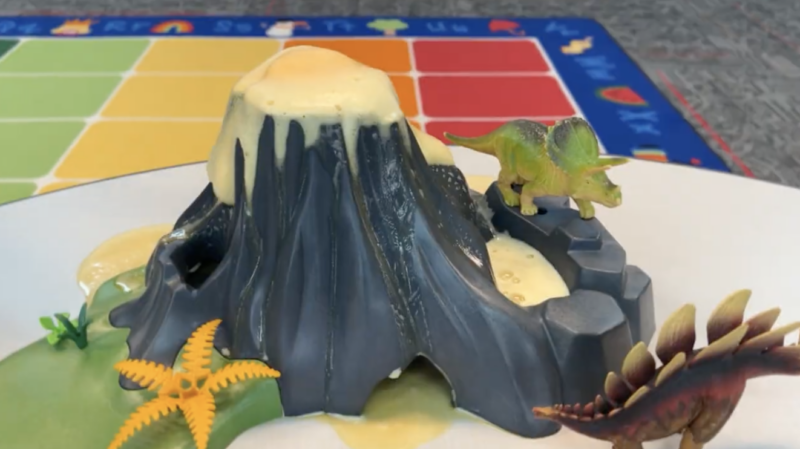
Erupt a baking soda volcano
- Difficulty: Easy
- Materials: Medium
- Materials Needed: Model volcano or container, baking soda, vinegar, dish soap, food coloring, tray
- Time: 15-20 minutes
- Best for: Classroom demonstration, Science fair project
Place baking soda inside a model volcano or container, then add vinegar, dish soap, and food coloring. Students can observe the bubbling eruption caused by a chemical reaction that produces carbon dioxide gas. Experiment with different amounts of each ingredient to compare the results.
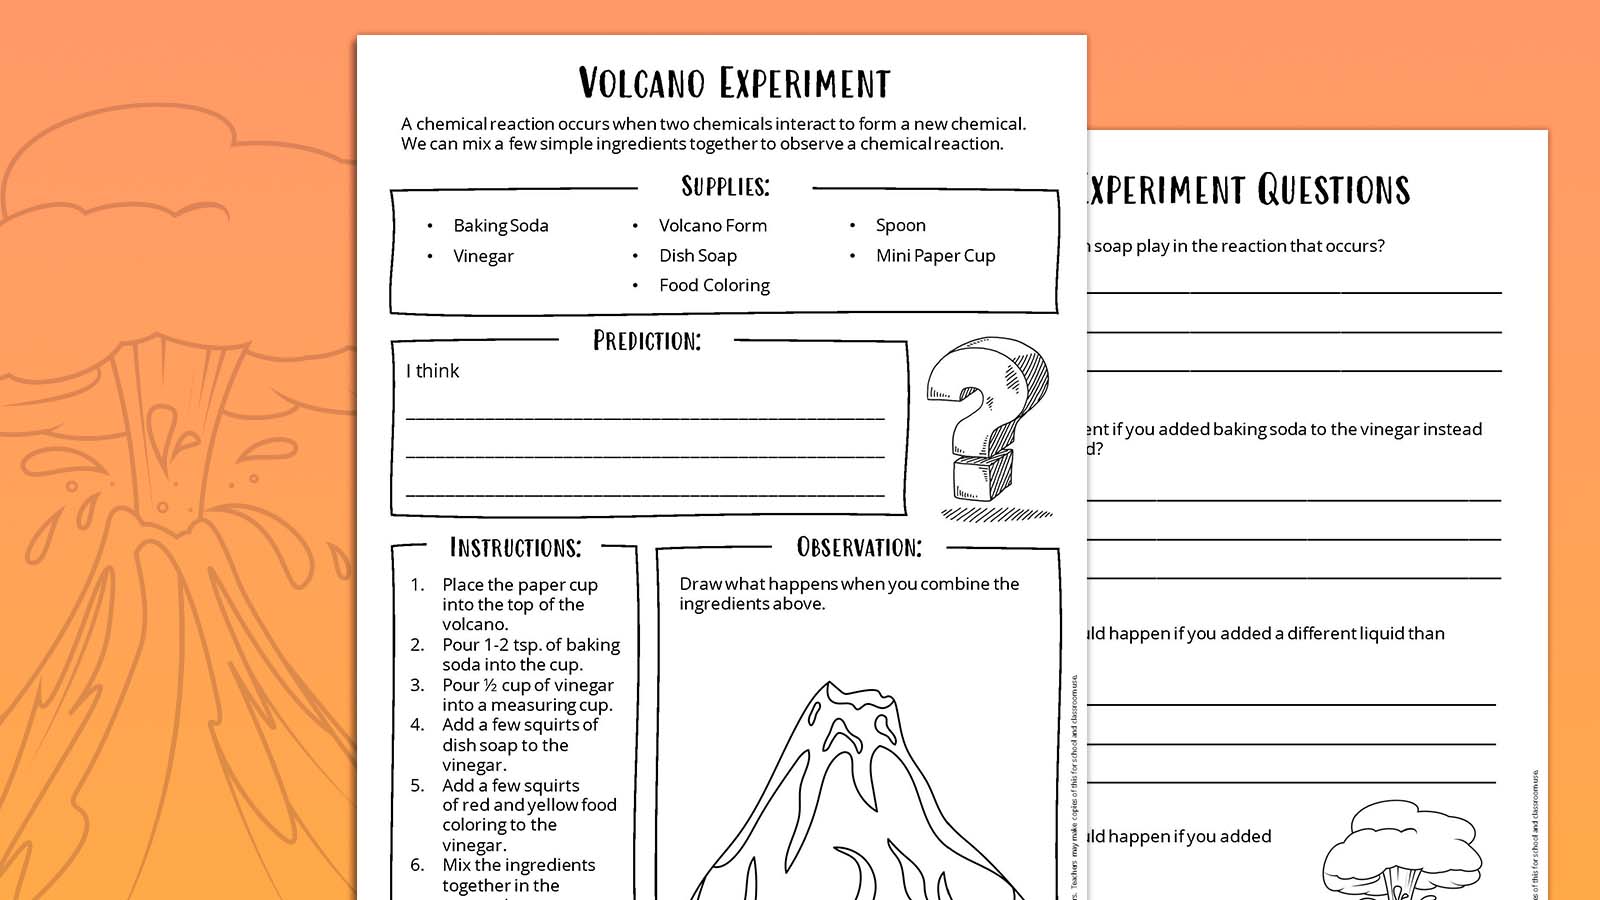
Baking Soda Volcano (Experiment + Demo Video)
Watch the video to learn how to make a baking soda volcano with your students. Then have them fill out the observation sheet.
4th Grade Engineering Projects
Give students a chance to build, test, and improve their own creations. These engineering challenges encourage problem-solving, creativity, and persistence as students design everything from roller coasters to working elevators.
Drinking-straw roller coaster
- Difficulty: Easy
- Materials: Basic
- Materials Needed: Drinking straws, tape, small ball or marble, cardboard base, scissors
- Time: 1 week
- Best for: Science fair experiment
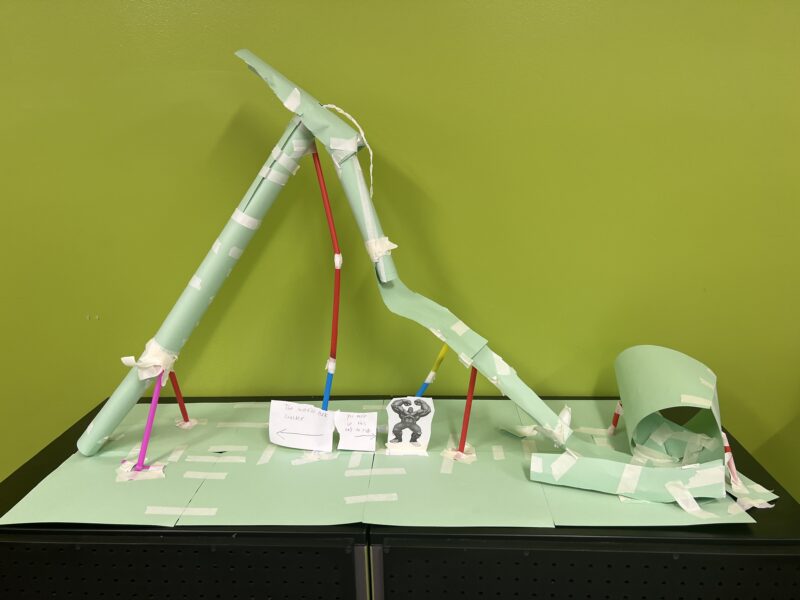
Use straws and tape to design a roller coaster track for a marble or small ball. Students can test hills, curves, and drops to see whether the marble reaches the end. Encourage them to revise their designs as they explore gravity, friction, motion, and the engineering process.
Wigglebot
- Difficulty: Medium
- Materials: Medium
- Materials Needed: Small motor, battery, toothbrush head or craft materials, tape, markers, adult supervision
- Time: 1 class period
- Best for: Hands-on experiment, Science fair project
Attach a small motor and battery to a toothbrush head or lightweight base. When the motor vibrates, the bot will wiggle across the surface. Students can adjust the weight placement or design and observe how balance affects the robot’s movement.
Catch a dinosaur
- Difficulty: Easy
- Materials: Basic
- Materials Needed: Toy dinosaur, Popsicle sticks, binder clips, rubber bands, tape, timer
- Time: 1 class period
- Best for: Hands-on experiment
Challenge students to design a structure that can safely contain a toy dinosaur. Give them a limited amount of time and a set of building materials. After testing the designs, ask students to improve their cages based on what worked and what did not.
Construct a working flashlight
- Difficulty: Advanced
- Materials: Advanced
- Materials Needed: LED bulb, battery, insulated wire, tape, cardboard tube or small container, aluminum foil if desired, adult supervision
- Time: 1 class period
- Best for: Hands-on experiment, Science fair project
Connect an LED bulb to a battery using wire, then place the components inside a simple casing. Students can experiment with different connections until the bulb lights up. Use the project to introduce circuits, electrical energy, and the importance of a complete path for electricity.
Bridge building challenge
- Difficulty: Advanced
- Materials: Medium
- Materials Needed: drinking straws, craft sticks, masking tape, glue, small objects (coins, washers, books)
- Time: 1 class period
- Best for: Hands-on experiment, Science fair project
Students test their civil engineering skills in this challenge to design, build, and test a bridge made out of craft sticks and straws. Divide students into groups and challenge them to build a bridge that can hold a specific amount of weight. When students are finished, test each bridge.
Build a balloon-powered car
- Difficulty: Medium
- Materials: Medium
- Materials Needed: Balloon, straw, tape, small toy car or student-built car, open floor space
- Time: 1 class period
- Best for: Hands-on experiment
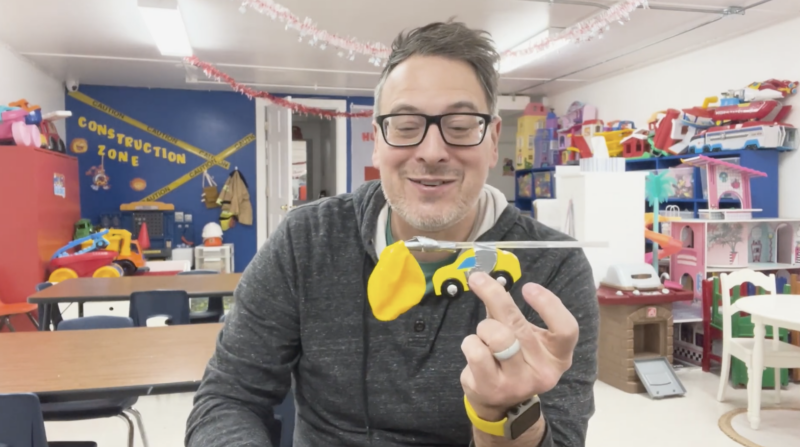
Attach a straw to the opening of a balloon and tape the straw securely on top of a small car. Inflate the balloon through the straw, pinch the end closed, then release it. Students can observe how escaping air propels the car forward and experiment with design changes to improve distance or speed.
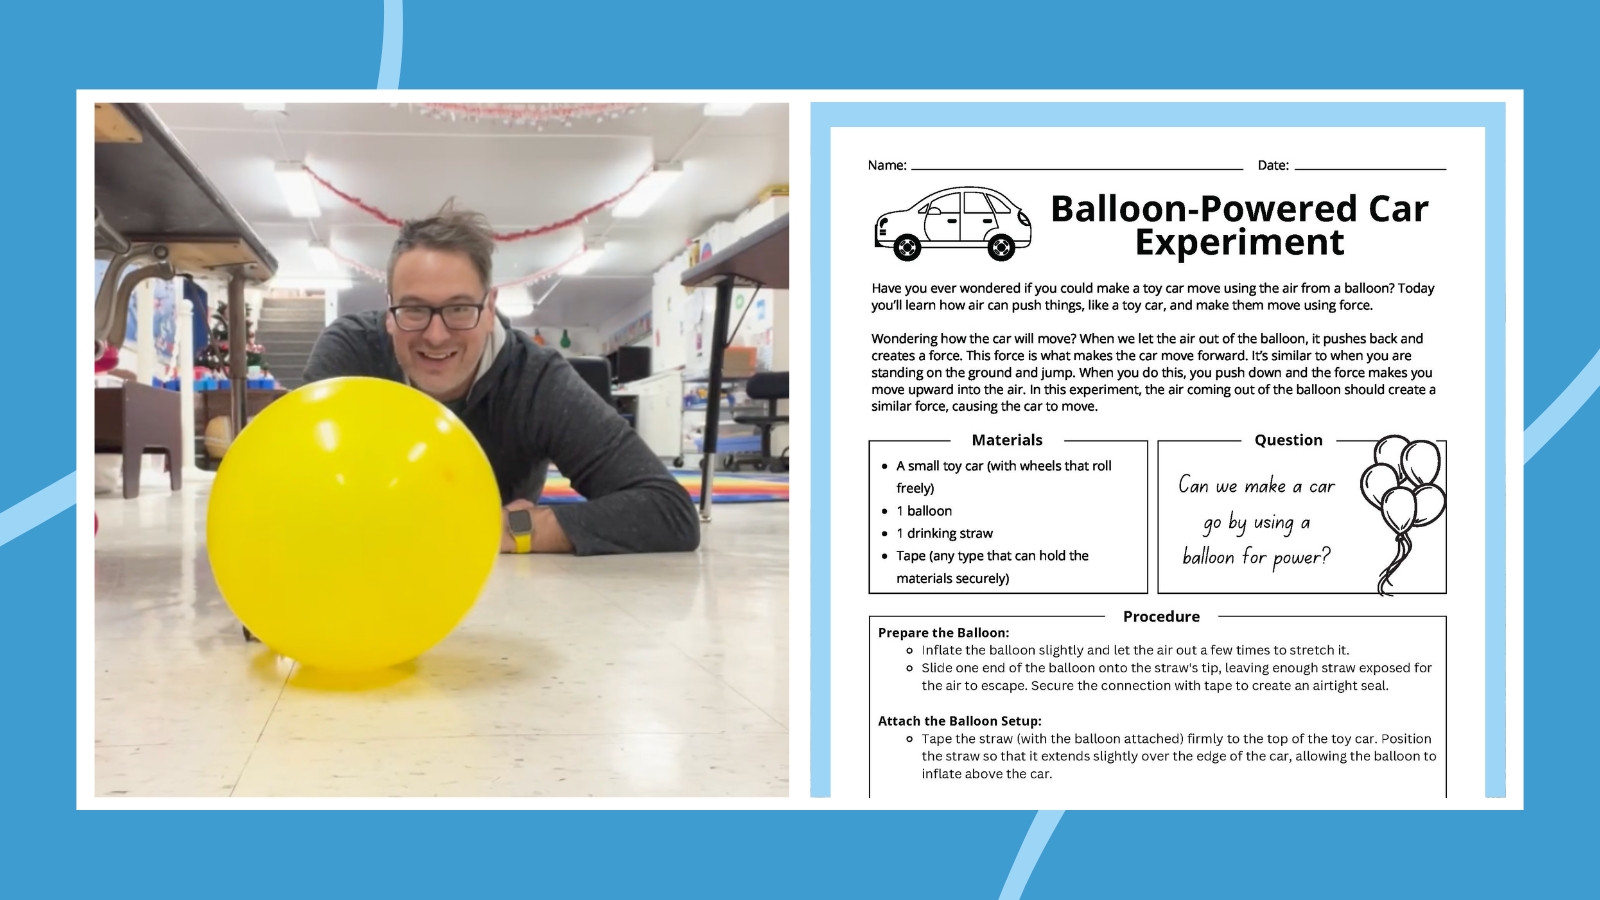
Balloon-Powered Car Experiment (Worksheet + Demo Video)
Watch the video to learn how to make a balloon-powered car. Then have students fill out the worksheet.
Build a LEGO tower
- Difficulty: Easy
- Materials: Medium
- Materials Needed: LEGO bricks or other building blocks, LEGO base plates if desired, ruler or measuring tape
- Time: 1 class period
- Best for: Hands-on experiment
Challenge students to build the tallest freestanding tower they can using a set number of bricks. Measure each structure and test its stability. Encourage students to compare designs and identify which building techniques create a stronger base.
Catapult challenge
- Difficulty: Medium
- Materials: Medium
- Materials Needed: rubber bands, cups, spoons, other building materials, ping pong balls
- Time: 1 class period
- Best for: Hands-on experiment, Science fair projects
Students make catapults out of rubber bands, plastic cups, spoons, and other everyday materials. When they have built their catapults, test them to see which catapult design sends a ping pong ball the farthest.
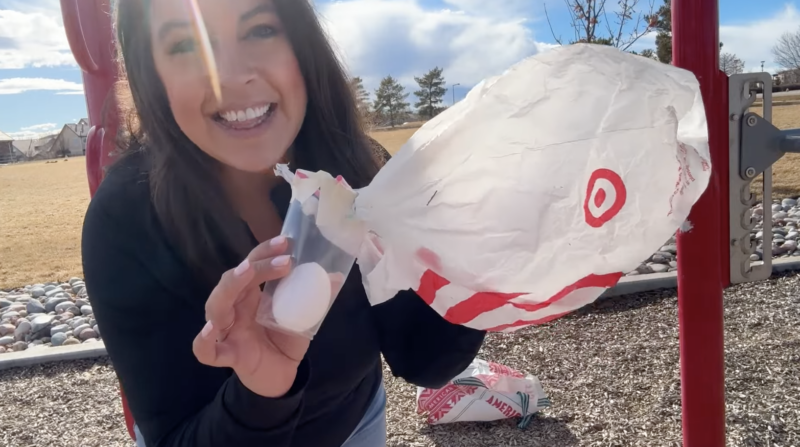
Try the egg-drop challenge
- Difficulty: Medium
- Materials: Medium
- Materials Needed: Eggs, straws, tape, paper, boxes, cups, cotton balls, bubble wrap, or other protective materials
- Time: 1 class period
- Best for: Hands-on experiment
Challenge students to build a container that protects an egg when dropped from a set height. After each test, inspect the egg and discuss which features helped absorb energy or reduce the force of impact. Encourage students to revise their designs before trying again.
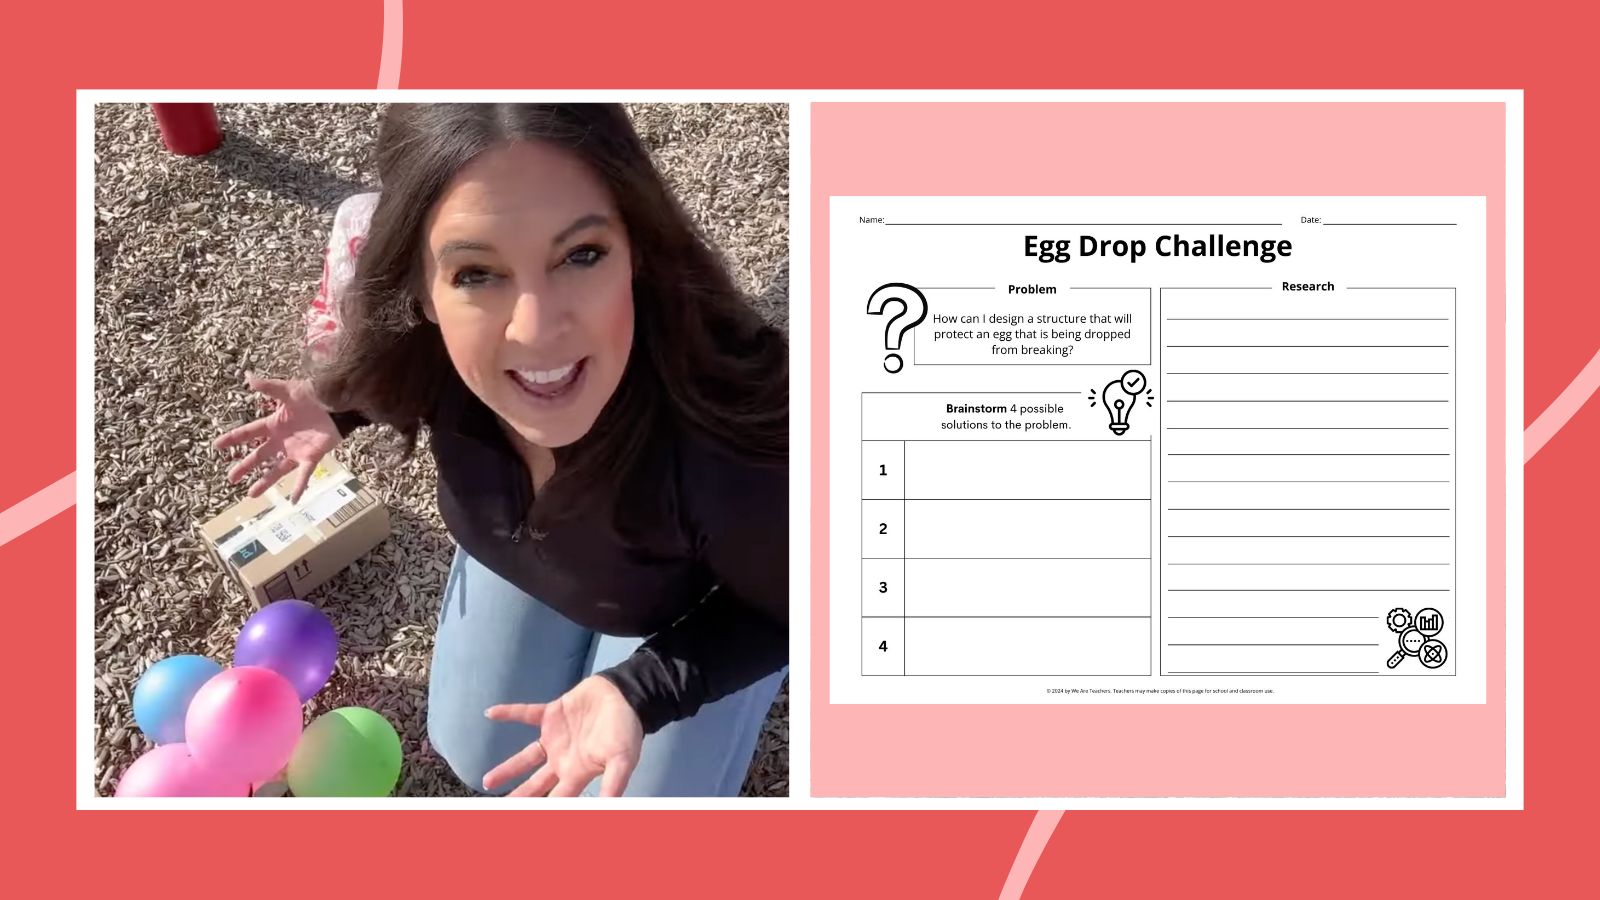
Egg Drop Challenge (Worksheet + Demo Video)
Watch the video to learn how to do the egg drop challenge. Then have students fill out the worksheet.
4th Grade Physics Experiments
Set up a pulley system
- Difficulty: Medium
- Materials: Medium
- Materials Needed: Pulley wheels, string, small weights or classroom objects, sturdy support
- Time: 1 class period
- Best for: Hands-on experiment, Science fair projects
Set up a pulley and use it to lift a small object. Students can compare the effort needed with one pulley versus a system that uses multiple pulleys. Discuss how pulleys make lifting easier by changing the direction or amount of force required.
Make water glow
- Difficulty: Easy
- Materials: Medium
- Materials Needed: Water, highlighter, clear container, black light, gloves, adult supervision
- Time: 15-20 minutes
- Best for: Classroom demonstration
Carefully remove the ink insert from a highlighter and soak it in water. Shine a black light on the container and observe the glowing effect. Students can explore fluorescence and discuss how some substances absorb ultraviolet light and release visible light.
Watch water move colors
- Difficulty: Easy
- Materials: Basic
- Materials Needed: Six small cups, water, food coloring, paper towels
- Time: 15-20 minutes
- Best for: Classroom demonstration, Science fair project
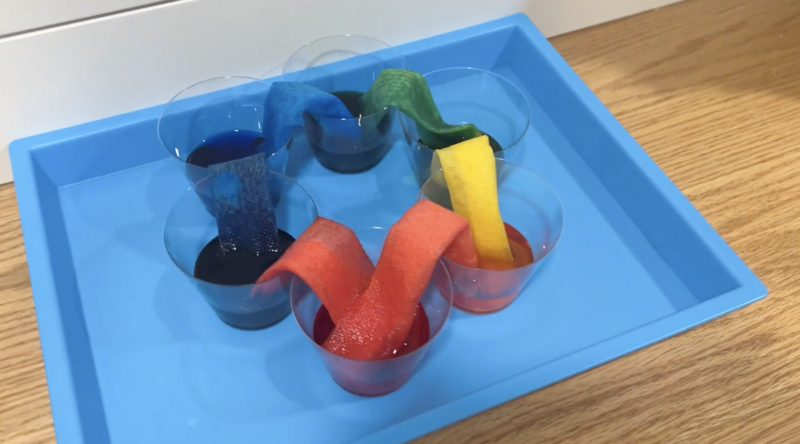
Arrange six cups in a circle, alternating between cups filled with colored water and empty cups. Place a folded strip of paper towel between each pair of cups. Over time, students will see water travel through the paper towels and mix in the empty cups, demonstrating capillary action.
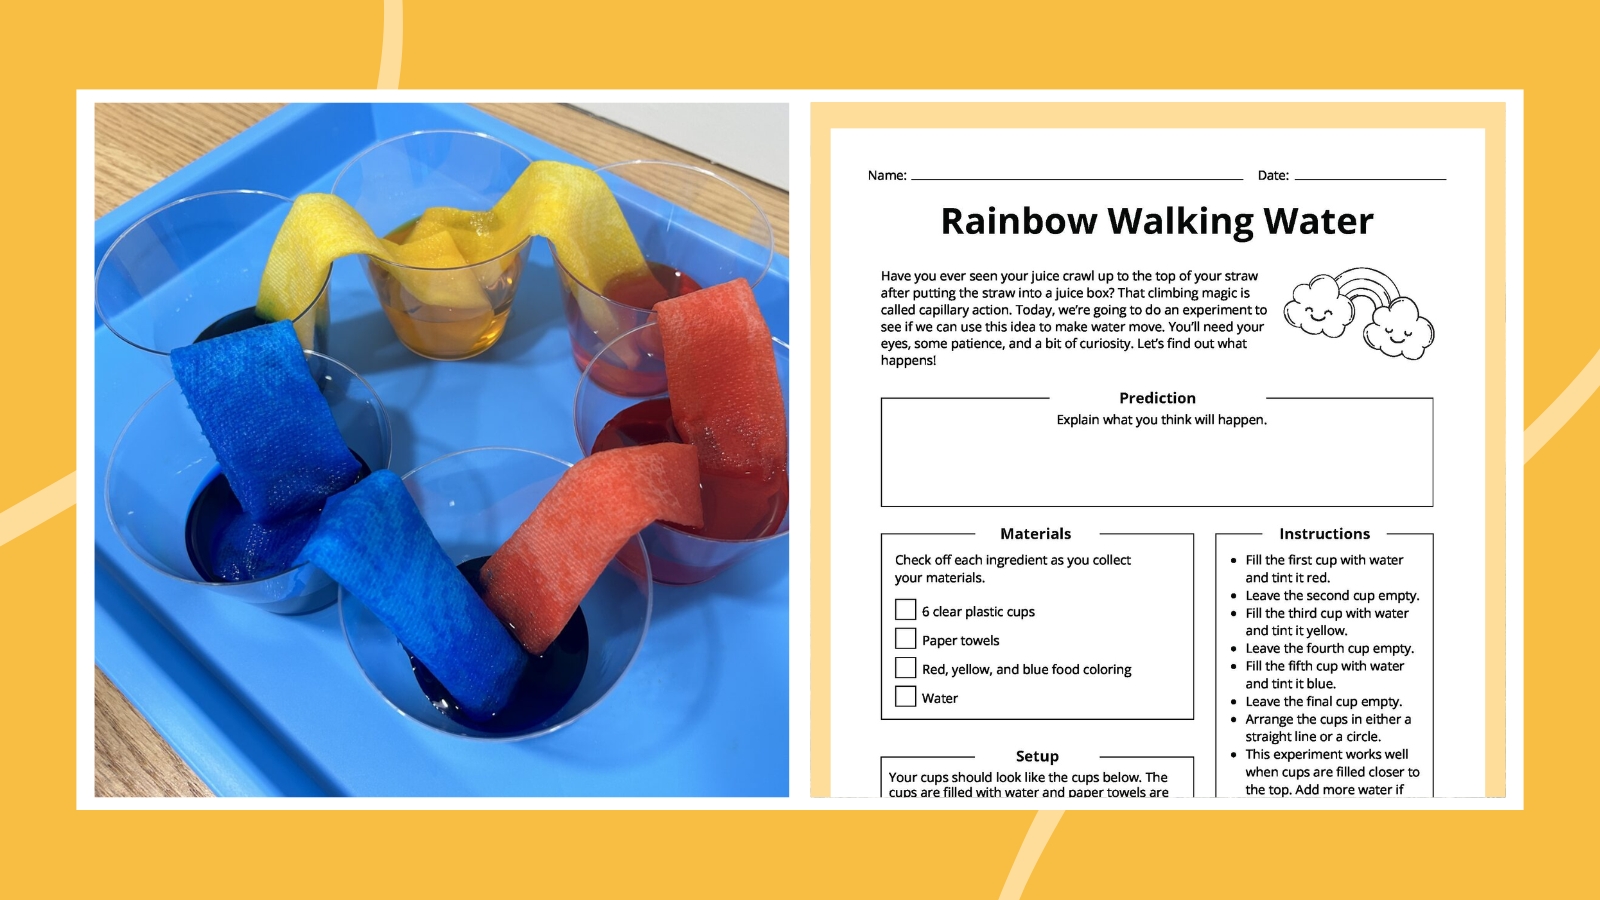
Rainbow Walking Water Experiment (Worksheet + Demo Video)
Watch our video to learn how to do the walking water experiment. Then have students fill out the observation sheet.
Design a working elevator
- Difficulty: Medium
- Materials: Basic
- Materials Needed: Paper cup or small box, string, cardboard, tape, paper clips, small weights
- Time: 1 class period
- Best for: Hands-on experiment, Science fair project
Create a simple elevator using a cup or box attached to string. Students can design a pulley or winding system to raise and lower the elevator while carrying small objects. Challenge them to improve the design so the elevator moves smoothly and supports more weight.
Build a magnet-powered car
- Difficulty: Medium
- Materials: Medium
- Materials Needed: Cardboard or lightweight base, wheels, dowels or skewers, straws, magnets, tape
- Time: 1 class period
- Best for: Hands-on experiment, Science fair project
Build a small car and use magnets to make it move without touching it directly. Students can place magnets on the car or use a separate magnet to push or pull the vehicle. Experiment with magnet orientation and distance to investigate attraction, repulsion, and motion.
Make a wind anemometer
- Difficulty: Medium
- Materials: Basic
- Materials Needed: Paper cups, straws, pencil, pin, tape, marker, adult supervision
- Time: 15-20 minutes to create, 1 week to record observations
- Best for: Hands-on experiment, Classroom demonstration
Attach paper cups to crossed straws and mount the structure on a pencil using a pin. Place the anemometer outside and count how many times the marked cup rotates during a set period. Students can compare wind speeds at different times or in different locations.
Experiment with a zip line
- Difficulty: Medium
- Materials: Medium
- Materials Needed: String, paper clips, Popsicle sticks, rubber bands, tape, small classroom objects
- Time: 1 class period
- Best for: Hands-on experiment
Stretch a length of string between two points and design a carrier that can travel along the line. Students can test different slopes, weights, and carrier designs to see which move most effectively. Use the activity to explore gravity, friction, and iterative design.
Compare a DIY thermos with a store-bought one
- Difficulty: Medium
- Materials: Medium
- Materials Needed: Bottles or cups, aluminum foil, fabric, bubble wrap, tape, warm or cold water, thermometer, store-bought thermos
- Time: 1 class period to 1 day
- Best for: Science fair projects, Hands-on experiment
Create an insulated container using household materials, then compare it with a store-bought thermos. Fill both containers with water at the same temperature and measure changes over time. Students can evaluate which materials slow heat transfer most effectively.
4th Grade Chemistry Experiments
These 4th grade science projects help students explore how materials behave and change. Experiment with chemical reactions through hands-on activities that make chemistry concepts easy to observe.
Make elephant toothpaste
- Difficulty: Medium
- Materials: Medium
- Materials Needed: Hydrogen peroxide, dish soap, yeast, warm water, plastic bottle, tray, safety goggles, gloves, adult supervision
- Time: 10-15 minutes
- Best for: Classroom demonstrations
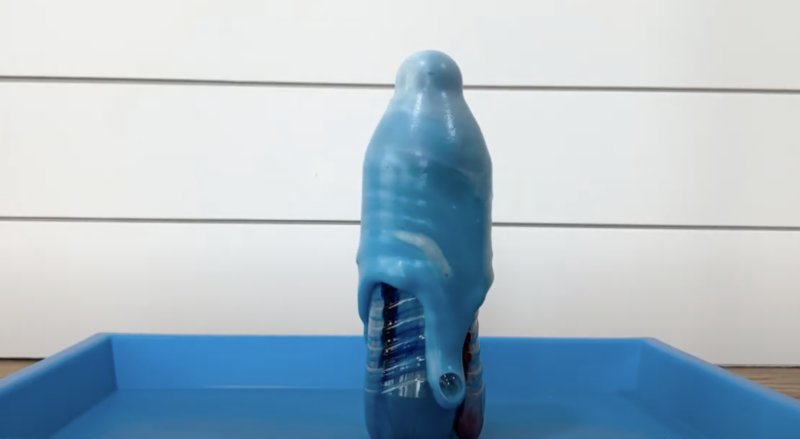
Mix dish soap and hydrogen peroxide in a bottle, then add activated yeast. Students can watch foam rapidly expand as oxygen gas is released and trapped in the soap bubbles. Use the demonstration to discuss chemical reactions, catalysts, and gas production.
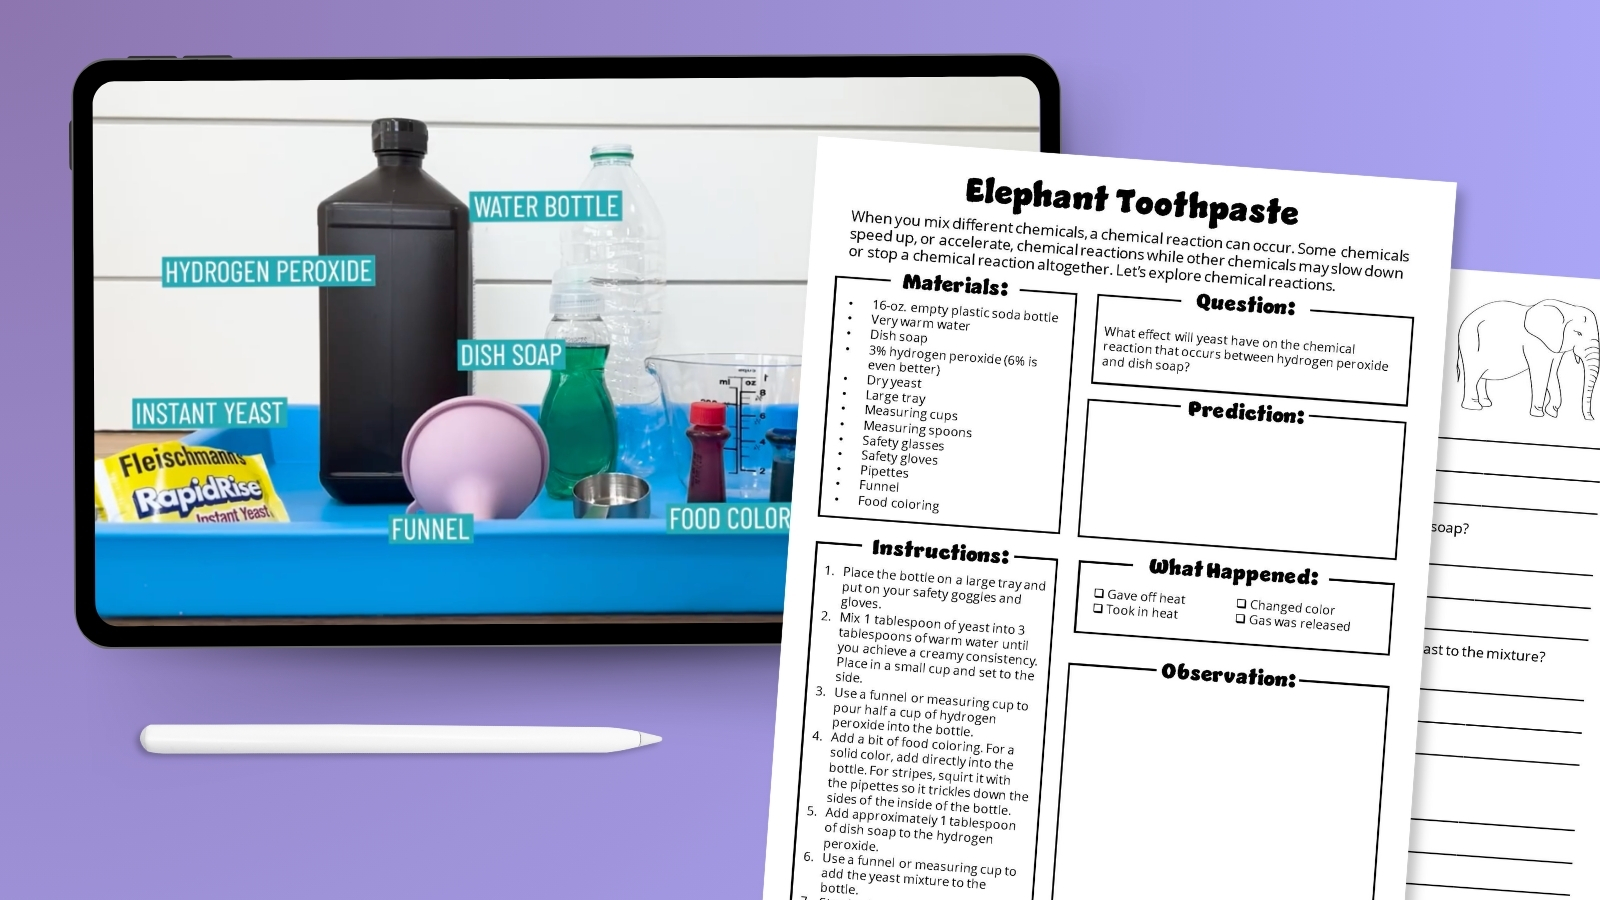
Elephant Toothpaste Experiment (Worksheet + Demo Video)
Watch our demo video to learn how to make elephant toothpaste. Then have students fill out the observation sheet.
Test Sharpie solubility
- Difficulty: Easy
- Materials: Medium
- Materials Needed: Permanent markers, cups, water, rubbing alcohol, paper or coffee filters, droppers
- Time: 10-15 minutes
- Best for: Hands-on experiment
Draw small permanent-marker dots on paper or coffee filters, then add drops of water and rubbing alcohol. Observe which liquid causes the ink to spread or dissolve more effectively. Students can compare solvents and discuss why some substances dissolve in certain liquids but not others.
Slime
- Difficulty: Easy
- Materials: Medium
- Materials Needed: Slime ingredients for several recipes, bowls, spoons, measuring tools, sealable containers
- Time: 30-40 minutes
- Best for: Hands-on experiment, Science fair project
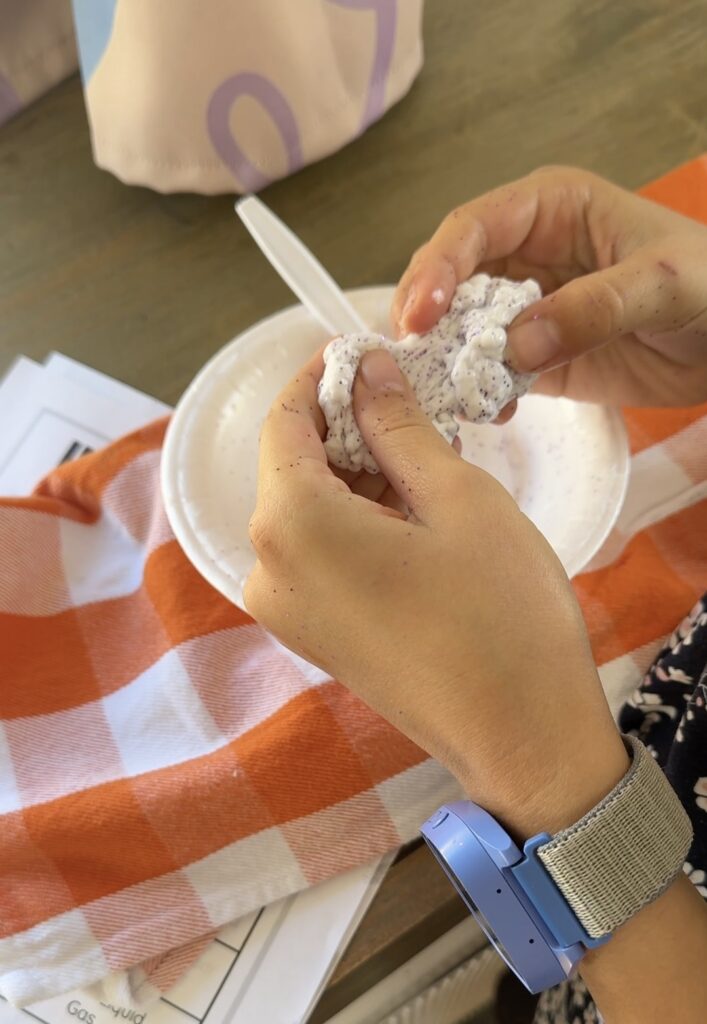
Make several types of slime and compare how each recipe behaves. Students can test how well the slime stretches, bounces, melts, breaks, or changes when chilled. Encourage them to record their observations and identify which ingredients affect each slime’s properties.
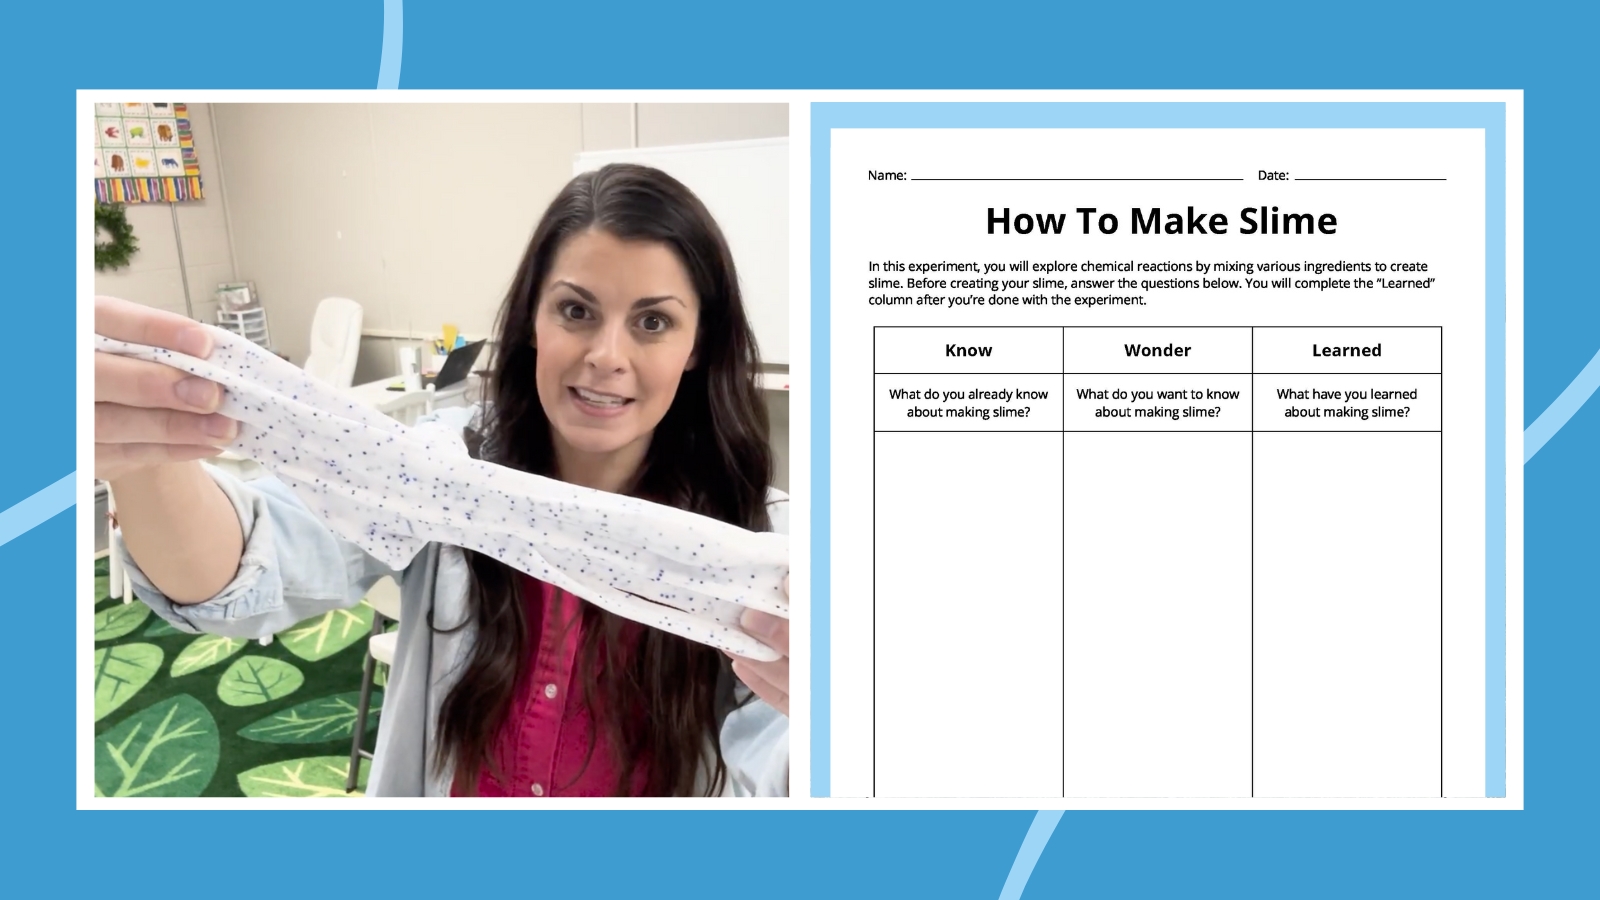
Slime Experiment (Worksheet + Demo Video)
Learn how to make slime with a video that includes recipes. Then use the experiment worksheet to compare them.
Magnetic slime
- Difficulty: Easy
- Materials: Medium
- Materials Needed: Slime, iron filings or iron oxide powder, strong magnet, gloves, and adult supervision needed
Mix iron filings or iron oxide powder into slime, then move a magnet near the mixture. Students can observe the slime stretching and shifting toward the magnet. Use the experiment to introduce magnetic forces and investigate how magnetic materials respond without direct contact.
Determine the iron content of cereal
- Difficulty: Easy
- Materials: Basic
- Materials Needed: Iron-fortified cereals, water, resealable bags or bowls, strong magnet, spoon
- Time: 30-40 minutes
- Best for: Science fair projects
Crush different cereals, mix each sample with water, and use a strong magnet to search for tiny iron particles. Students can compare cereal brands and nutrition labels to see whether products with more listed iron produce more visible particles.
Oxidized apple slices
- Difficulty: Easy
- Materials: Basic
- Materials Needed: Apple slices, lemon juice, water, soda, salt water, or other liquids; cups; labels
- Time: 10-15 minutes
- Best for: Classroom demonstration
Place apple slices in different liquids and observe how quickly each one turns brown. Students can compare the results and identify which liquid slows browning most effectively. Use the experiment to discuss oxidation and how certain substances can slow chemical reactions.
Inflate balloons
- Difficulty: Easy
- Materials: Basic
- Materials Needed: Balloons, baking soda, vinegar, water, other test liquids, small bottles, funnel, timer
- Time: 10-15 minutes
- Best for: Classroom observations
Add the same amount of baking soda to several balloons and pour different liquids into labeled bottles. Attach each balloon to a bottle, lift the balloon so the baking soda falls into the liquid, and time how quickly each balloon inflates. Students can compare reactions and discuss gas production.
Transform milk into plastic
- Difficulty: Medium
- Materials: Basic
- Materials Needed: Milk, vinegar, microwave-safe bowl or saucepan, spoon, strainer, paper towels, cookie cutters if desired, adult supervision
- Time: 15 minutes in class, 1 week to harden
- Best for: Science fair project, Classroom demonstration
Warm some milk and stir in vinegar until solid clumps form. Strain the mixture, press out the liquid, and shape the remaining casein material. Allow it to dry and harden over several days while discussing how chemical reactions can create new materials.
Blow giant bubbles
- Difficulty: Medium
- Materials: Medium
- Materials Needed: Bubble solution, straws or sticks, yarn or string, hot glue if desired, tray, adult supervision
- Time: 15-20 minutes
- Best for: Hands-on experiment, Science fair project
Create a large bubble wand using straws or sticks connected with yarn. Dip the wand into bubble solution and slowly move it through the air to form giant bubbles. Students can experiment with wand sizes and bubble-solution recipes while exploring surface tension and molecular interactions.
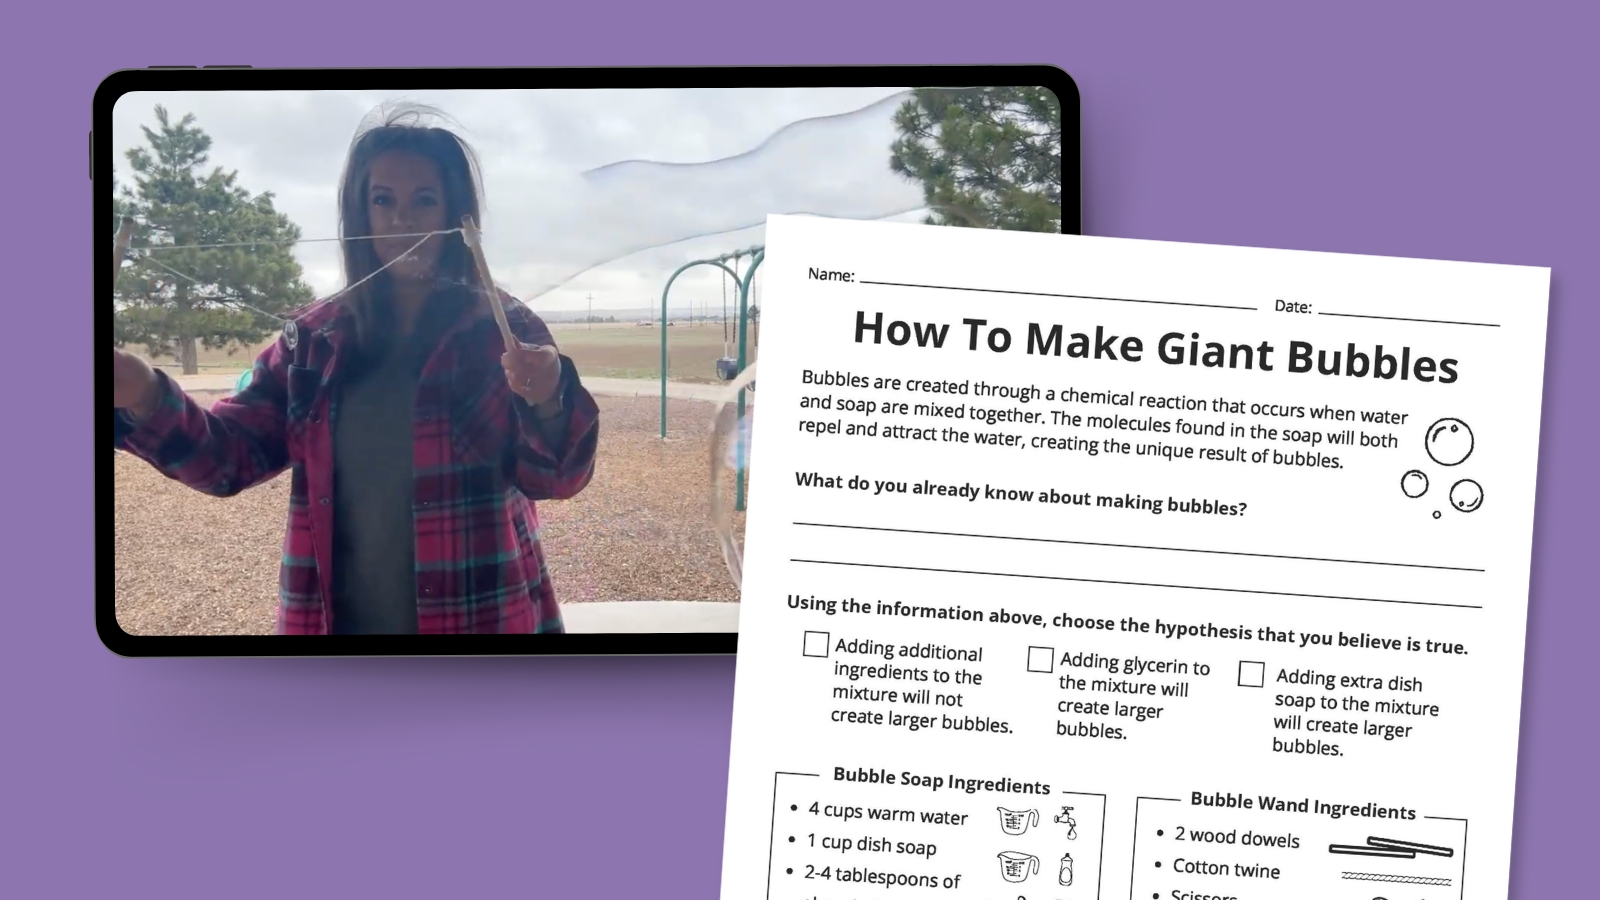
Giant Bubble Experiment (Worksheet + Demo Video)
Watch the video to learn how to make giant bubbles. Then have students fill out the observation sheet.
Grow crystal names
- Difficulty: Easy
- Materials: Medium
- Materials Needed: Pipe cleaners, borax, hot water, jars, string, pencils or craft sticks, adult supervision
- Time: 10-15 minutes
- Best for: Classroom demonstration
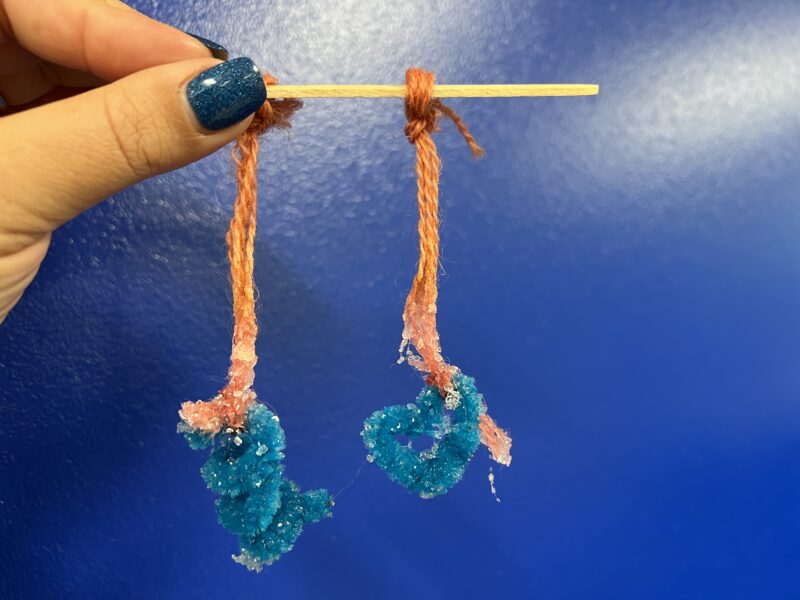
Bend pipe cleaners into letters or shapes and suspend them inside jars of hot borax solution. Leave the jars undisturbed overnight and observe the crystals that form. Students can explore saturated solutions and see how dissolved particles collect into crystal structures.
Find out whether mood rings really work
- Difficulty: Easy
- Materials: Medium
- Materials Needed: Mood rings, cups of warm and cold water, thermometer if desired, recording sheet
- Time: 10-15 minutes
- Best for: Classroom demonstrations
Expose mood rings to different temperatures and record how their colors change. Students can compare the results with a temperature chart and determine whether the rings are responding to mood or heat. Use the experiment to introduce thermochromic materials and variables.
Explore the causes of tooth decay
- Difficulty: Easy
- Materials: Medium
- Materials Needed: Eggshells or hard-boiled eggs, soda, juice, milk, water, cups, labels
- Time: 10-15 minutes in class, 1 week of observation
- Best for: Classroom demonstration, Science fair project
Place eggshells or hard-boiled eggs in different liquids and observe them over several days. Students can compare changes in color, texture, and strength. Use the results to discuss how acidic drinks can affect tooth enamel and why healthy dental habits matter.
Dissolve sugar
- Difficulty: Easy
- Materials: Basic
- Materials Needed: Sugar, water, cups, spoons, hot and cold water if desired, measuring spoons
- Time: 15-20 minutes
- Best for: Classroom demonstration
Add sugar to water and stir until it dissolves. Students can compare how quickly sugar dissolves in hot and cold water or test how much sugar each cup can hold before no more will dissolve. Use the activity to introduce solubility, solutions, and variables.
Test drying times for oil paints
- Difficulty: Medium
- Materials: Medium
- Materials Needed: Oil paints in different colors, paper or canvas, paintbrushes, labels, timer or observation sheet
- Time: 1 class period
- Best for: Hands-on experiment
Apply equal amounts of several oil-paint colors to a surface and observe them over time. Record when each paint becomes touch-dry and compare the results. Students can explore how pigments and other variables affect drying time. We promise it’s more fun than watching paint dry!
Get your free printable science fair awards!
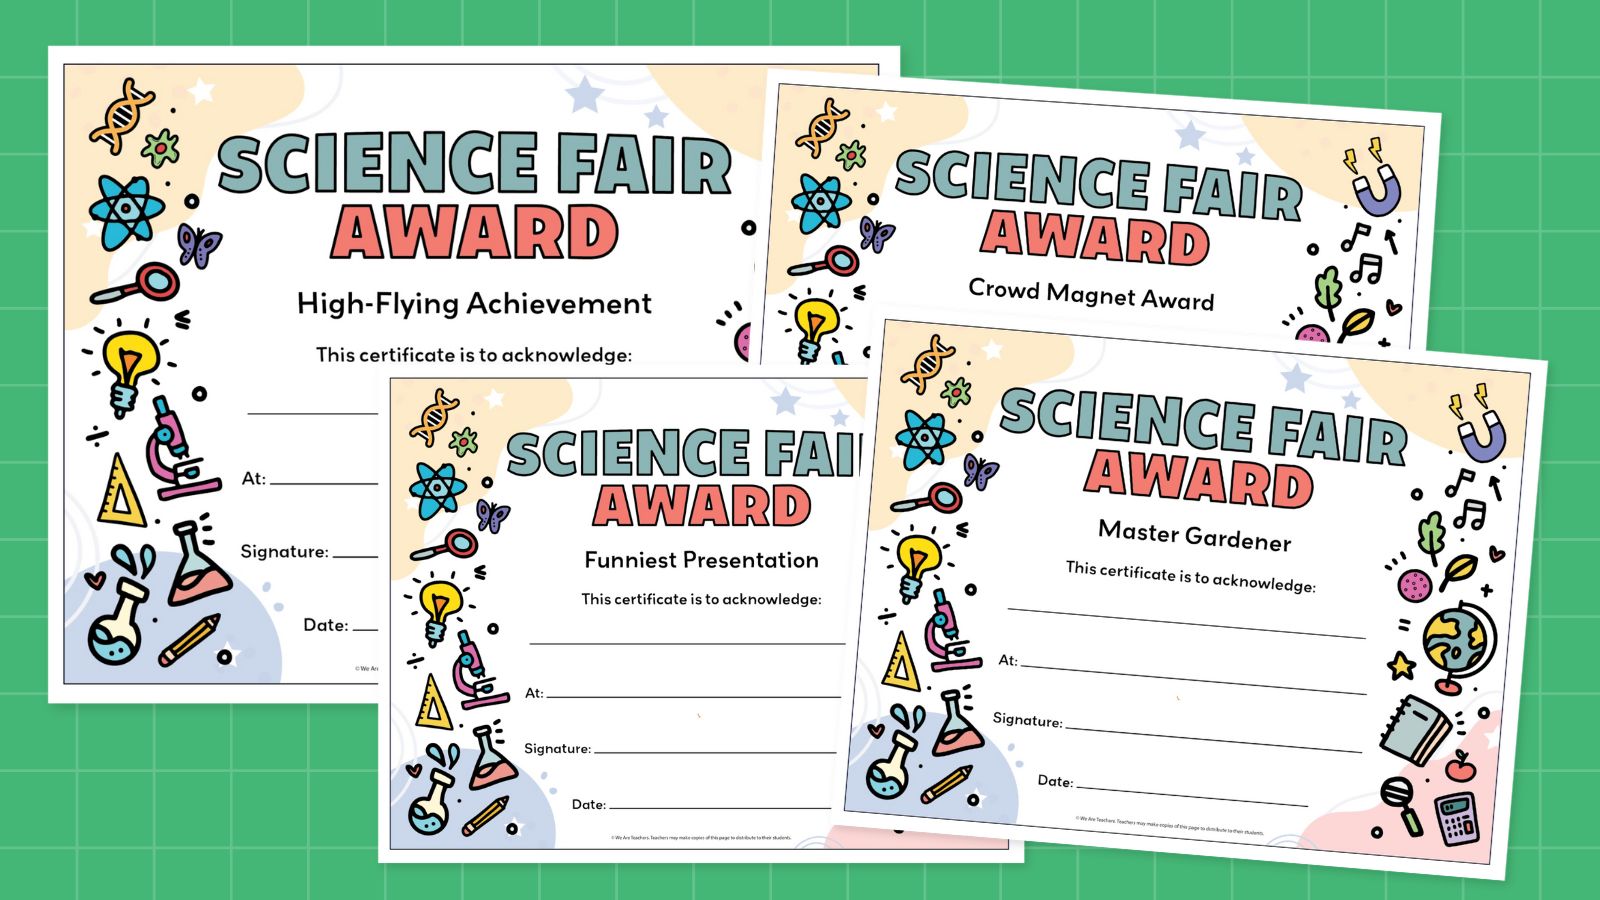
If you’re organizing a science fair, be sure to grab our free printable bundle of award certificates with more than 40 categories along with a customizable blank certificate so you can create your own awards. Just follow the link below and fill out the form to get yours.